

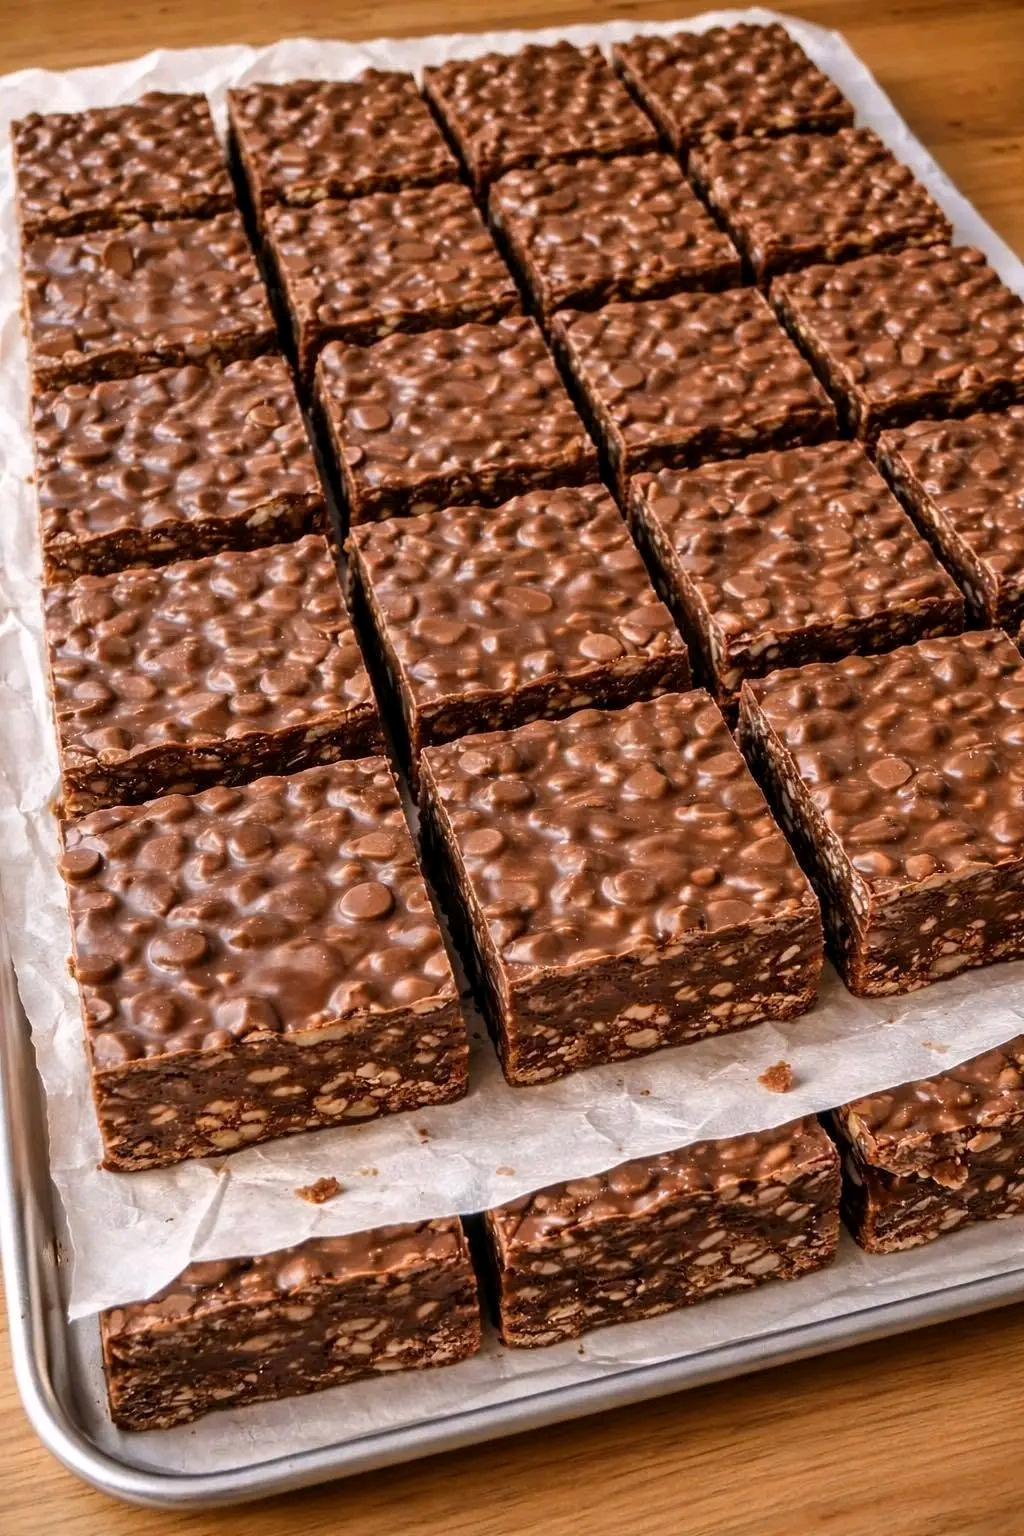
No-Bake Homemade Crunch Bars
Introduction
No-Bake Homemade Crunch Bars are an easy, delicious treat made without turning on the oven. They combine crispy cereal, creamy peanut butter, honey or maple syrup, and chocolate into a satisfying bar with a wonderful contrast between crunchy and smooth textures.
These bars are perfect for an afternoon snack, lunchbox treat, dessert, or homemade sweet when you want something quick and simple. The best part is that they require only a few basic ingredients and can be prepared ahead of time.
Nutritional Information
Approximate nutrition per bar when cut into 12 bars:
- Calories: 220–250 kcal
- Protein: 5–6 g
- Carbohydrates: 25–29 g
- Fat: 12–14 g
- Fiber: 2–3 g
- Sugar: 14–17 g
- Sodium: 80–120 mg
Nutrition varies depending on the cereal, chocolate, nut butter, and sweetener used.
Ingredients
For the Crunch Base
- 4 cups crispy rice cereal
- ¾ cup creamy peanut butter
- ½ cup honey or pure maple syrup
- ¼ cup coconut oil
- 1 teaspoon vanilla extract
- ¼ teaspoon salt
For the Chocolate Topping
- 1½ cups semi-sweet or milk chocolate chips
- 2 tablespoons creamy peanut butter
- 1 teaspoon coconut oil, optional
Optional Additions
You can customize your bars with:
- ¼ cup chopped almonds
- ¼ cup chopped peanuts
- 2 tablespoons mini chocolate chips
- 2 tablespoons shredded coconut
- 2 tablespoons chopped dried cranberries
- A small pinch of flaky sea salt
- ½ teaspoon cinnamon
- 1 tablespoon chia seeds
Equipment
- 8 × 8-inch or 9 × 9-inch square pan
- Parchment paper
- Medium saucepan
- Large mixing bowl
- Spatula
- Microwave-safe bowl
- Refrigerator
Instructions
Step 1: Prepare the Pan
Line an 8 × 8-inch square pan with parchment paper.
Leave a little extra parchment hanging over the sides. This will make it much easier to lift the finished bars from the pan.
Lightly grease the parchment if desired.
Step 2: Prepare the Crunch Cereal
Place the crispy rice cereal into a large mixing bowl.
If you’re adding chopped peanuts, almonds, coconut, or other dry additions, mix them into the cereal now.
Set the bowl aside.
Step 3: Make the Peanut Butter Mixture
Add the following ingredients to a saucepan:
- Peanut butter
- Honey or maple syrup
- Coconut oil
- Salt
Place the saucepan over low to medium-low heat.
Stir continuously until everything melts together and becomes smooth.
Do not allow the mixture to boil aggressively. You simply want the ingredients warm, melted, and well combined.
Remove the saucepan from the heat.
Stir in the vanilla extract.
Step 4: Combine Everything
Pour the warm peanut butter mixture over the crispy cereal.
Using a large spatula, gently fold everything together.
Continue mixing until the cereal is evenly coated.
Try not to crush the cereal too much because the crispy pieces are what give these bars their signature crunch.
Step 5: Form the Bars
Transfer the mixture into your parchment-lined pan.
Spread it evenly.
Use the back of a spatula, measuring cup, or another piece of parchment paper to press the mixture firmly into the pan.
This step is important.
Pressing firmly helps the bars hold together once they’re chilled.
Step 6: Make the Chocolate Layer
Place the chocolate chips and peanut butter into a microwave-safe bowl.
Heat for about 20–30 seconds at a time, stirring after each interval.
Continue until the chocolate is mostly melted.
Stir until completely smooth.
If the chocolate seems too thick, add approximately 1 teaspoon of coconut oil and mix well.
Step 7: Add the Chocolate
Pour the melted chocolate over the crunch base.
Spread it evenly from corner to corner.
For a beautiful finishing touch, sprinkle a tiny amount of flaky sea salt over the chocolate while it’s still soft.
Step 8: Chill
Place the pan in the refrigerator for approximately 1–2 hours, or until the chocolate is firm and the bars feel solid.
For an even firmer texture, you can chill them for longer.
Step 9: Cut the Bars
Remove the chilled slab from the pan using the parchment paper.
Place it on a cutting board.
Allow it to sit at room temperature for approximately 5 minutes before cutting.
Use a sharp knife to cut it into:
- 9 large bars
- 12 medium bars
- or 16 smaller snack-sized squares
Methods
Method 1: Classic Peanut Butter Crunch
The classic version uses crispy rice cereal, peanut butter, honey, and chocolate.
The peanut butter and honey create a sticky mixture that binds the cereal together, while the chocolate topping adds richness and sweetness.
This is the best version for a traditional homemade crunch bar.
Method 2: Extra-Chocolate Crunch Bars
For serious chocolate lovers, add:
- 2 tablespoons cocoa powder to the peanut butter mixture
- Mini chocolate chips to the cereal
- Extra chocolate on top
You can also drizzle melted white chocolate over the finished bars for a bakery-style appearance.
Method 3: Almond Butter Crunch Bars
Replace peanut butter with almond butter.
This gives the bars a slightly more delicate nutty flavor.
Add chopped roasted almonds to increase the crunch.
Method 4: Dark Chocolate Crunch Bars
Use dark chocolate instead of milk chocolate.
The bitterness of dark chocolate balances beautifully with the sweetness of honey or maple syrup.
Add a small amount of flaky sea salt for an especially good sweet-and-salty combination.
Method 5: Coconut Crunch Bars
Add about ¼ cup unsweetened shredded coconut to the cereal.
You can also sprinkle toasted coconut over the chocolate layer.
The combination of coconut, peanut butter, chocolate, and crispy cereal creates a tropical-inspired variation.
History
Crunch-style chocolate bars have become popular because they combine two textures people naturally enjoy: crispiness and creaminess.
Chocolate-covered crispy rice treats have been made in different forms for decades, particularly as homemade versions of commercially produced chocolate-and-crisped-rice candy bars.
The no-bake approach is especially popular in home kitchens because it eliminates the need for complicated baking techniques. Instead of preparing a traditional cake or cookie dough, the ingredients are melted, combined, pressed into a pan, chilled, and cut.
Homemade versions also allow people to control the sweetness, chocolate type, nut butter, cereal, and additional ingredients.
Formation of the Bars
The formation of these bars depends on three important components.
1. The Crispy Cereal
The cereal provides the structure and characteristic crunch.
2. The Peanut Butter Mixture
The warm peanut butter, honey, and coconut oil coat the cereal and help the pieces stick together.
3. The Chocolate Layer
The chocolate forms a firm topping after chilling and gives the bars their rich dessert-like finish.
The key is to press the cereal mixture firmly into the pan. If you only spread it lightly, the finished bars may crumble when cut.
Important Tips for Perfect Crunch Bars
Don’t Overheat the Peanut Butter
Keep the heat low. Overheating the mixture can change its texture and make the bars greasy.
Don’t Crush the Cereal
Mix gently. You want to preserve as many crispy pieces as possible.
Press Firmly
This is one of the most important steps. Firm pressure creates compact bars that hold together.
Don’t Skip the Chill
The refrigerator allows the peanut butter mixture to firm and the chocolate to harden.
Use Good Chocolate
Since chocolate is one of the main flavors, using a good-quality chocolate can make a noticeable difference.
Let Them Rest Before Cutting
If the bars are extremely cold, the chocolate may crack when you cut them. Let them sit for a few minutes first.
Storage
Store the finished crunch bars in an airtight container.
Refrigerator
They can generally be kept refrigerated for approximately 1–2 weeks.
Room Temperature
If your kitchen is cool, they can be kept at room temperature for a few days, although refrigeration gives them a firmer texture.
Freezer
For longer storage, wrap individual bars in parchment paper or plastic wrap and place them in a freezer-safe container.
They can generally be frozen for approximately 2–3 months.
Allow them to thaw for several minutes before eating.
Serving Ideas
These bars are delicious straight from the refrigerator, but you can make them even more special.
Serve them with:
- A glass of cold milk
- Coffee
- Tea
- Hot chocolate
- Greek yogurt
- Fresh strawberries
- Banana slices
- Vanilla ice cream
For dessert, warm one slightly and serve it alongside a scoop of vanilla ice cream.
Lovers’ Favorite Variations
Peanut Butter Chocolate Lover
Add extra peanut butter to the chocolate topping and sprinkle chopped roasted peanuts over it.
Chocolate Lover
Use dark chocolate in the base and another layer of milk chocolate on top.
Sweet-and-Salty Lover
Finish with flaky sea salt and roasted peanuts.
Coconut Lover
Add shredded coconut to the cereal and toasted coconut on top.
Nut Lover
Mix chopped almonds, peanuts, and cashews into the crunchy base.
Caramel Lover
Drizzle a thin layer of caramel over the chocolate before chilling.
Troubleshooting
Why are my bars falling apart?
The cereal mixture may not have been pressed firmly enough, or there may not have been enough binding mixture.
Next time, press the mixture down very firmly and make sure the cereal is evenly coated.
Why are my bars too hard?
They may have been chilled for a long time or contain too much chocolate or coconut oil that has hardened.
Let them sit at room temperature for a few minutes before eating.
Why is the chocolate cracking?
Allow the bars to rest for approximately 5–10 minutes before slicing, then use a sharp knife.
Why are my bars too sweet?
Use dark chocolate and reduce the honey or maple syrup slightly. Unsweetened peanut butter can also help balance the sweetness.
Make-Ahead Method
These are excellent make-ahead treats.
Prepare the entire recipe, chill it until firm, cut the bars, and store them in an airtight container.
You can prepare them several days before serving, making them convenient for:
- Parties
- Family gatherings
- Lunchboxes
- Picnics
- Holiday dessert trays
- Afternoon snacks
- Homemade food gifts
Conclusion
No-Bake Homemade Crunch Bars are one of those recipes that prove you don’t need an oven or complicated ingredients to create an impressive homemade dessert.
The combination of crispy cereal, creamy peanut butter, sweet honey, and smooth chocolate creates a delicious balance of textures and flavors. They’re quick to prepare, easy to customize, and perfect for both everyday snacking and special occasions.
The secret to the best bars is simple: coat the cereal evenly, press the mixture firmly, use plenty of quality chocolate, and give everything enough time to chill.
Final Favorite Version
For the ultimate homemade crunch bar, use crispy rice cereal + creamy peanut butter + honey + vanilla + milk or semi-sweet chocolate + roasted peanuts + a tiny pinch of flaky sea salt.
The result is crunchy, chewy, creamy, chocolatey, nutty, and just salty enough to keep you reaching for another piece.