

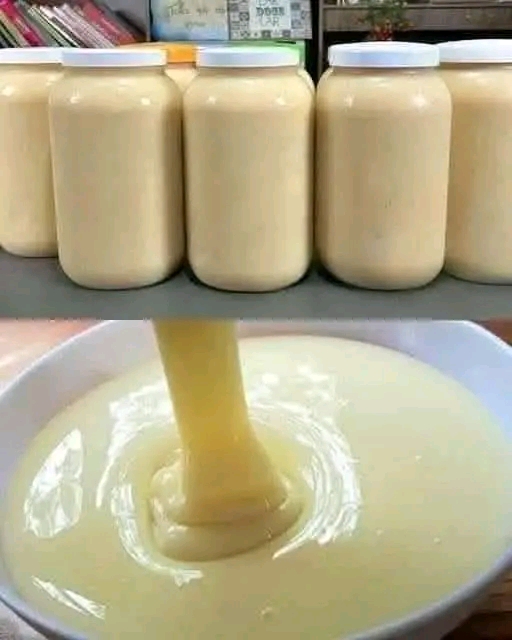
Sugar-Free Condensed Milk (Just 3 Ingredients!)
Introduction
Sugar-Free Condensed Milk is a rich, creamy, and versatile ingredient that lets you enjoy the classic taste and texture of traditional sweetened condensed milk without added sugar. Perfect for low-carb, keto, diabetic-friendly, and sugar-conscious lifestyles, this homemade version uses only three simple ingredients and comes together in less than 30 minutes.
Whether you’re making cheesecakes, fudge, ice cream, coffee drinks, pies, candies, or baked goods, this sugar-free condensed milk delivers a luscious consistency and delicious sweetness while keeping carbohydrates low. It’s an excellent pantry staple that can be made ahead and stored in the refrigerator whenever you need it.
Nutritional Information (Per 2 Tablespoons)
Makes: About 1¼ cups (20 tablespoons)
- Calories: 70 kcal
- Protein: 2 g
- Carbohydrates: 2 g
- Dietary Fiber: 0 g
- Net Carbs: 2 g
- Fat: 6 g
- Saturated Fat: 4 g
- Cholesterol: 20 mg
- Sodium: 30 mg
- Calcium: 8% Daily Value
Nutrition values are approximate and depend on the ingredients used.
Ingredients
You only need three ingredients:
- 2 cups (480 ml) heavy whipping cream
- ¾ cup powdered erythritol or your favorite powdered sugar-free sweetener
- ¼ cup unsalted butter
Equipment Needed
- Medium saucepan
- Whisk
- Silicone spatula
- Measuring cups
- Measuring spoons
- Glass jar or airtight container
Instructions
Step 1: Combine Ingredients
Pour the heavy cream into a medium saucepan.
Add the powdered sugar-free sweetener and butter.
Whisk until well combined.
Step 2: Heat Gently
Place the saucepan over medium-low heat.
Stir continuously until the butter melts completely and the sweetener dissolves.
Do not allow the mixture to boil rapidly.
Step 3: Simmer
Reduce the heat to low.
Let the mixture simmer gently for 20–25 minutes.
Stir frequently to prevent scorching.
The mixture should reduce by about one-third and become noticeably thicker.
Step 4: Cool
Remove the saucepan from the heat.
Allow the condensed milk to cool for 15–20 minutes.
It will continue to thicken as it cools.
Step 5: Store
Transfer the condensed milk to a clean glass jar.
Refrigerate for at least 2 hours before using.
Shake or stir before each use if separation occurs.
Preparation Time
- Prep Time: 5 minutes
- Cook Time: 25 minutes
- Cooling Time: 20 minutes
- Chilling Time: 2 hours
- Total Time: Approximately 2 hours 50 minutes
Methods for Success
Method 1: Use Powdered Sweetener
Powdered sweetener dissolves much more easily than granulated varieties and creates a smoother final product.
Method 2: Simmer Slowly
A gentle simmer allows the liquid to reduce without burning or separating.
Method 3: Stir Frequently
Frequent stirring keeps the mixture smooth and prevents sticking on the bottom of the pan.
Method 4: Don’t Overcook
The mixture should coat the back of a spoon. It will thicken further after cooling.
Method 5: Chill Before Using
Refrigeration improves both the consistency and flavor.
Method 6: Store Properly
Keep the condensed milk in an airtight container to maintain freshness.
History
Sweetened condensed milk was invented in the 19th century as a way to preserve milk before refrigeration became widely available. By removing much of the water and adding sweetener, it became shelf-stable and ideal for baking, desserts, and beverages.
As low-carb and keto diets gained popularity, home cooks began creating sugar-free versions using alternative sweeteners. These homemade recipes maintain the creamy richness of traditional condensed milk while reducing sugar, making them suitable for a wider range of dietary preferences.
Uses for Sugar-Free Condensed Milk
- Cheesecakes
- Fudge
- Ice cream
- Coffee and lattes
- Hot chocolate
- Keto candies
- Pie fillings
- No-bake desserts
- Protein treats
- Homemade caramel sauce
Flavor Variations
- Vanilla Sugar-Free Condensed Milk
- Cinnamon Condensed Milk
- Chocolate Sugar-Free Condensed Milk
- Coconut Condensed Milk
- Espresso Condensed Milk
- Pumpkin Spice Condensed Milk
- Salted Caramel Style
- Almond Vanilla Condensed Milk
Storage
- Refrigerate in an airtight container for up to 7 days.
- Stir well before each use.
- Freeze for up to 2 months in freezer-safe containers.
- Thaw overnight in the refrigerator before using.
Why People Love This Recipe
- Only three ingredients.
- No refined sugar.
- Keto and low-carb friendly.
- Rich and creamy texture.
- Budget-friendly.
- Easy to prepare.
- Perfect for baking and desserts.
- No artificial preservatives.
- Great for meal prep.
- Versatile and customizable.
Expert Tips
- Use high-quality heavy cream for the richest flavor.
- Keep the heat low to avoid curdling.
- Taste before removing from the heat and adjust sweetness if desired.
- If the mixture becomes too thick, whisk in a tablespoon of warm cream.
- Allow it to cool completely before transferring to a storage jar.
Conclusion
This Sugar-Free Condensed Milk with Just 3 Ingredients is an easy, creamy, and delicious alternative to traditional sweetened condensed milk. It delivers the same rich consistency and versatility while eliminating added sugar, making it an excellent choice for healthier desserts and beverages. Once you try this homemade version, you’ll love having it ready in your refrigerator for all your favorite recipes.
Why Recipe Lovers Adore It
Home cooks and dessert lovers appreciate this recipe because it combines simplicity with incredible versatility. With just three everyday ingredients, it creates a silky, sweet condensed milk that can be used in countless recipes—from cheesecakes and fudge to coffee drinks and ice cream. Its rich flavor, smooth texture, and sugar-free profile make it a favorite for anyone looking to enjoy classic desserts in a healthier way.