

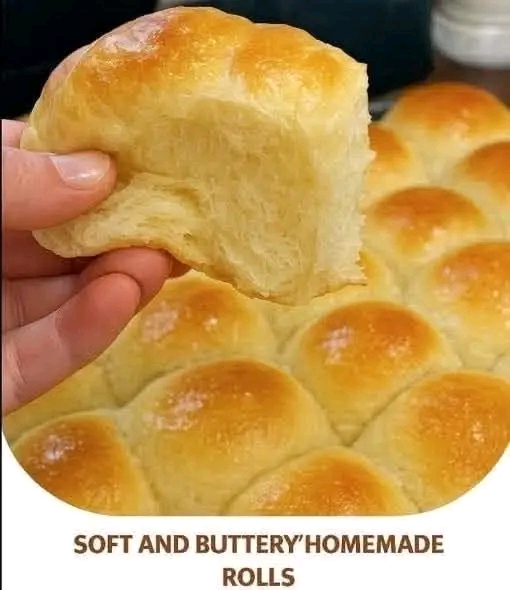
Soft and Buttery Homemade Rolls
Introduction
Few aromas are as comforting as freshly baked homemade dinner rolls. Soft and Buttery Homemade Rolls are a timeless favorite, known for their fluffy texture, tender crumb, and rich buttery flavor. Whether served alongside a holiday feast, a hearty bowl of soup, or simply enjoyed warm with butter and jam, these rolls are a staple in kitchens around the world.
This recipe is beginner-friendly while producing bakery-quality results. With a simple list of pantry ingredients and a little patience for rising, you’ll create rolls that are light, airy, and irresistibly soft. These rolls also freeze well, making them perfect for meal preparation and special occasions.
History
Bread has been one of humanity’s oldest prepared foods, with evidence of bread-making dating back over 10,000 years. Soft dinner rolls became especially popular during the 19th century as commercial yeast became widely available, allowing bakers to consistently produce light and fluffy bread.
In North America and Europe, buttery dinner rolls became a traditional accompaniment to Sunday dinners, Thanksgiving, Christmas feasts, and family gatherings. Today, homemade rolls remain a beloved comfort food enjoyed across many cultures.
Preparation Information
- Preparation Time: 25 minutes
- First Rise: 1½–2 hours
- Shaping Time: 20 minutes
- Second Rise: 45–60 minutes
- Baking Time: 18–22 minutes
- Total Time: About 3½ hours
- Yield: 15–18 rolls
- Difficulty: Easy to Intermediate
Nutritional Information (Per Roll)
Approximate values
- Calories: 185
- Protein: 5 g
- Carbohydrates: 27 g
- Fat: 6 g
- Saturated Fat: 3.5 g
- Fiber: 1 g
- Sugar: 3 g
- Sodium: 180 mg
- Calcium: 3% DV
- Iron: 8% DV
- Potassium: 90 mg
Ingredients
For the Dough
- 4 cups (500 g) all-purpose or bread flour
- 1 cup (240 ml) warm whole milk (about 110°F/43°C)
- ¼ cup (50 g) granulated sugar
- 2¼ teaspoons (1 packet) active dry yeast
- 1 teaspoon salt
- 1 large egg, room temperature
- ¼ cup (57 g) unsalted butter, softened
- 2 tablespoons vegetable oil or melted butter
For Brushing
- 3 tablespoons melted butter
- Flaky sea salt (optional)
- Fresh chopped parsley (optional)
Equipment Needed
- Large mixing bowl
- Stand mixer with dough hook (optional)
- Measuring cups and spoons
- Kitchen scale (optional)
- Dough scraper
- 9×13-inch baking pan
- Pastry brush
- Clean kitchen towel or plastic wrap
- Wire cooling rack
Instructions
Step 1: Activate the Yeast
- Pour the warm milk into a bowl.
- Stir in the sugar.
- Sprinkle the yeast over the milk.
- Let it sit for 5–10 minutes until foamy.
Step 2: Prepare the Dough
- Add the egg, softened butter, oil, and salt.
- Gradually mix in the flour.
- Stir until a shaggy dough forms.
Step 3: Knead
- Knead by hand for 10–12 minutes or with a stand mixer for 8–10 minutes.
- The dough should become smooth, soft, and slightly tacky but not sticky.
Step 4: First Rise
- Place the dough in a lightly greased bowl.
- Cover with a towel or plastic wrap.
- Let rise in a warm place until doubled in size (1½–2 hours).
Step 5: Shape the Rolls
- Punch down the dough gently.
- Divide it into 15–18 equal portions.
- Roll each portion into a smooth ball.
- Arrange the dough balls in a greased baking pan, leaving a little space between them.
Step 6: Second Rise
- Cover the pan.
- Let the rolls rise for 45–60 minutes until puffy and nearly doubled.
Step 7: Bake
- Preheat the oven to 375°F (190°C).
- Bake for 18–22 minutes, or until the tops are golden brown and the internal temperature reaches about 190°F (88°C).
Step 8: Finish
- Brush the hot rolls generously with melted butter.
- Sprinkle with flaky sea salt or chopped parsley if desired.
- Cool slightly before serving.
Baking Methods
Traditional Oven
Bake at 375°F (190°C) for 18–22 minutes for classic soft, golden rolls.
Convection Oven
Reduce the temperature to 350°F (175°C) and bake for 16–20 minutes.
Cast Iron Skillet
Arrange the rolls in a buttered cast iron skillet for beautifully browned sides and a rustic presentation.
Bread Machine
Use the dough cycle to mix and knead the dough, then shape, proof, and bake in the oven.
Serving Suggestions
These rolls pair wonderfully with:
- Butter and fruit preserves
- Honey or cinnamon butter
- Soups and stews
- Roast chicken or turkey
- Beef pot roast
- Ham dinners
- Pasta dishes
- Barbecue meals
- Breakfast sandwiches
- Sliders with pulled pork or beef
Recipe Variations
Garlic Butter Rolls
Brush with garlic-infused butter after baking.
Herb Rolls
Add chopped rosemary, thyme, parsley, or chives to the dough.
Cheese Rolls
Fold shredded cheddar, mozzarella, or Parmesan into the dough before shaping.
Honey Butter Rolls
Replace part of the sugar with honey and brush with honey butter after baking.
Whole Wheat Rolls
Replace half of the all-purpose flour with whole wheat flour for a heartier texture.
Seeded Rolls
Top with sesame seeds, poppy seeds, sunflower seeds, or everything bagel seasoning before baking.
Storage
- Room Temperature: Store in an airtight container for up to 3 days.
- Refrigerator: Up to 1 week.
- Freezer: Freeze for up to 3 months. Thaw at room temperature and warm in the oven before serving.
Tips for Perfect Rolls
- Use warm—not hot—milk to activate the yeast.
- Measure flour accurately to avoid dense rolls.
- Knead until the dough is smooth and elastic.
- Allow enough time for both rises.
- Do not overbake; this helps keep the rolls soft.
- Brush with butter immediately after baking for a tender crust and rich flavor.
Why People Love These Rolls
- Soft, fluffy, and airy texture
- Rich buttery flavor
- Perfect for everyday meals and holidays
- Easy enough for beginner bakers
- Great for sandwiches and sliders
- Freezer-friendly
- Made with simple pantry ingredients
- Family-friendly and crowd-pleasing
- Delicious served warm or at room temperature
- Customizable with herbs, cheese, or sweet toppings
Conclusion
Soft and Buttery Homemade Rolls are a timeless baking classic that never goes out of style. Their tender crumb, golden tops, and rich buttery finish make them an ideal companion to nearly any meal, from casual weeknight dinners to festive holiday celebrations. Once you master this recipe, you’ll have a reliable favorite that can be adapted with different flavors and enjoyed fresh from the oven any time of year.
Why Bread Lovers Adore Homemade Rolls
Homemade bread enthusiasts treasure these rolls for their comforting aroma, pillowy softness, and fresh-from-the-oven taste that simply can’t be matched by store-bought versions. The joy of watching the dough rise, shaping each roll by hand, and sharing warm bread with family and friends makes this recipe as rewarding to make as it is to eat. Whether enjoyed plain, spread with butter, or transformed into sandwiches, these buttery rolls are sure to become a cherished tradition in any kitchen.