

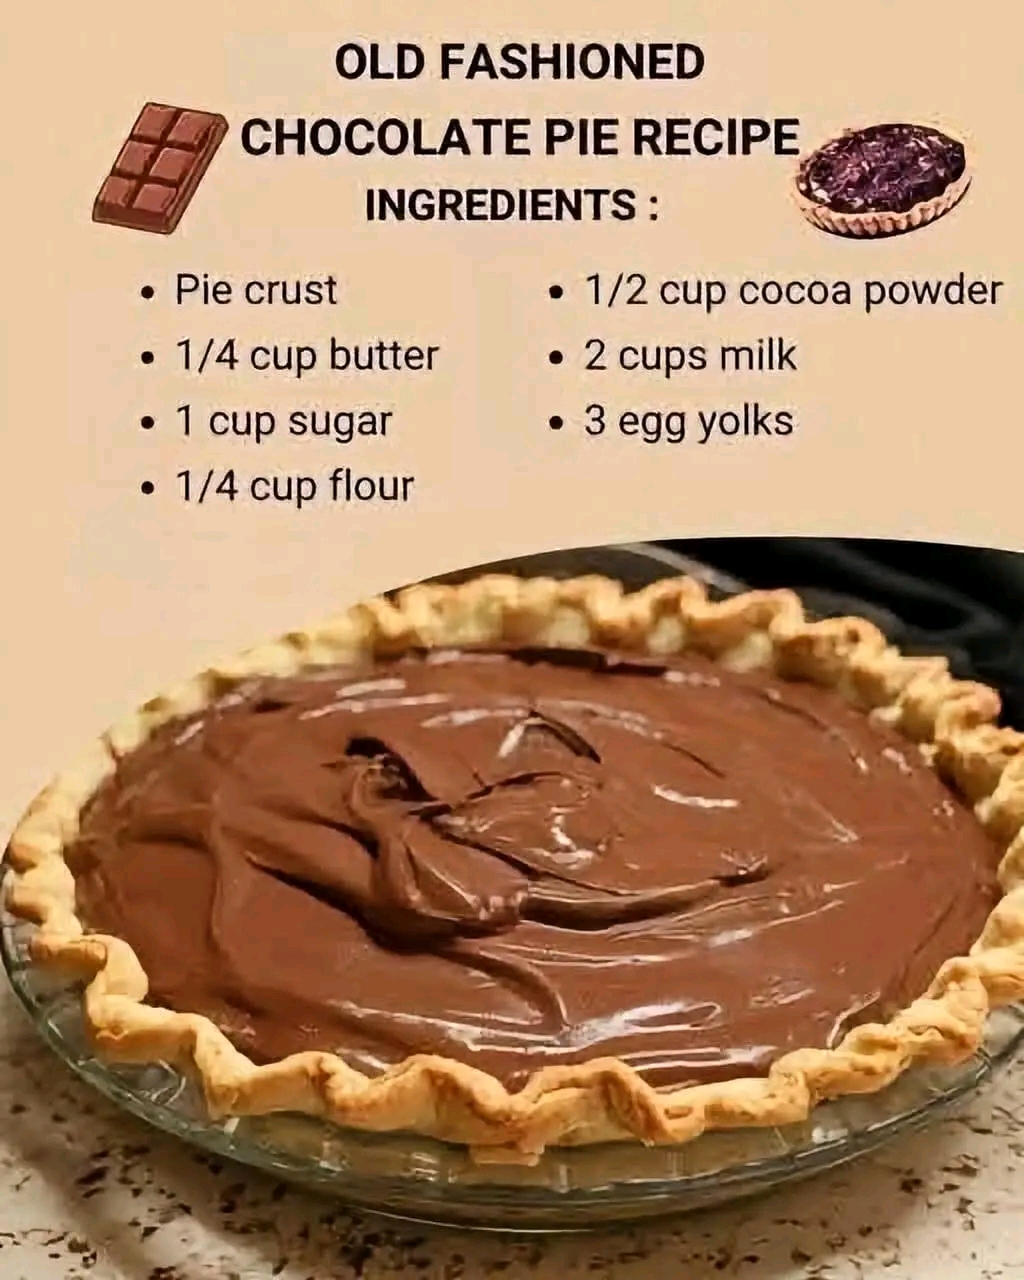
Absolutely! Here’s a long, website-ready version of the Old-Fashioned Chocolate Pie recipe, with a warm introduction, history, ingredients, detailed methods, formation, serving ideas, tips, and a delicious conclusion. 🍫🥧
🍫🥧 Old-Fashioned Chocolate Pie
Introduction
There are some desserts that never go out of style, and Old-Fashioned Chocolate Pie is one of them. Rich, creamy, chocolatey, and wonderfully nostalgic, this classic pie is the kind of dessert that reminds you of homemade family dinners, Sunday suppers, holiday tables, and recipes carefully passed from one generation to the next.
Made with a flaky pie crust and a smooth homemade chocolate custard filling, this pie is wonderfully simple. The filling begins with everyday pantry ingredients—sugar, flour, cocoa powder, milk, egg yolks, butter, and vanilla—but when they come together over gentle heat, they transform into a silky chocolate pudding that sets beautifully inside the crust.
Whether you serve it plain, with a cloud of whipped cream, or topped with chocolate shavings, every bite delivers that comforting old-fashioned flavor that chocolate lovers adore.
🛒 Ingredients
For the Pie
- 1 prepared pie crust, homemade or store-bought
- 1/4 cup (57 g) unsalted butter
- 1 cup (200 g) granulated sugar
- 1/4 cup (30 g) all-purpose flour
- 1/2 cup (43–45 g) unsweetened cocoa powder
- 2 cups (480 ml) whole milk
- 3 large egg yolks
- 1 teaspoon pure vanilla extract
Optional Toppings
For an especially beautiful presentation, you can add:
- Whipped cream
- Chocolate curls or chocolate shavings
- A light dusting of cocoa powder
- Powdered sugar
- Mini chocolate chips
- A few fresh berries
- A small scoop of vanilla ice cream
🥧 Step 1: Prepare the Pie Crust
If you’re using a homemade pie crust, prepare and chill the dough according to your recipe.
Preheat your oven to 375°F (190°C).
Place the pie crust into a 9-inch pie dish and gently press it into the bottom and sides. Trim and crimp the edges as desired.
Prick the bottom of the crust several times with a fork. This helps prevent the crust from puffing up while baking.
For an especially crisp crust, line it with parchment paper and fill it with pie weights or dried beans.
Bake until the crust is lightly golden and cooked through, usually around 12–18 minutes, depending on the crust.
Remove the weights and parchment and allow the crust to cool completely.
Tip: The crust should be fully baked before adding the chocolate filling because the filling itself doesn’t require a long baking time.
🍫 Step 2: Make the Chocolate Filling
In a medium saucepan, combine:
- 1 cup sugar
- 1/4 cup flour
- 1/2 cup cocoa powder
Whisk the dry ingredients together thoroughly.
This step is important because evenly mixing the flour and cocoa with the sugar helps prevent lumps when the milk is added.
Slowly pour in the milk while whisking continuously.
Continue whisking until the mixture is smooth and there are no visible pockets of cocoa or flour.
🔥 Step 3: Cook the Chocolate Custard
Place the saucepan over medium-low to medium heat.
Cook the mixture slowly, stirring and whisking frequently.
As the milk warms, the flour will begin to thicken the mixture. The cocoa will dissolve into the milk, creating a rich chocolate-colored custard.
Continue cooking until the mixture becomes noticeably thick and creamy.
This can take approximately 7–10 minutes, depending on your saucepan and heat level.
Don’t rush this step.
A gentle cooking temperature helps create a smooth filling and reduces the chance of scorching the milk.
🥚 Step 4: Temper the Egg Yolks
Place the three egg yolks in a small bowl and whisk them lightly.
Now comes an important technique called tempering.
Slowly add a small amount of the hot chocolate mixture to the egg yolks while whisking constantly.
Add another small amount and continue whisking.
This gradually warms the yolks instead of exposing them directly to the hot mixture.
Once the yolks are warmed, slowly pour the egg-yolk mixture back into the saucepan while whisking continuously.
🍮 Step 5: Finish the Filling
Continue cooking over medium-low heat, stirring constantly, until the custard becomes thick and silky.
You want a consistency similar to thick pudding.
Remove the saucepan from the heat.
Add the 1/4 cup butter and 1 teaspoon vanilla extract.
Whisk until the butter has completely melted and the filling becomes smooth, glossy, and beautifully creamy.
The vanilla might seem like a small addition, but it helps round out the chocolate flavor and gives the pie that classic homemade-dessert aroma.
🥧 Step 6: Fill the Pie
Pour the warm chocolate filling into the cooled, baked pie crust.
Use a spatula to gently spread the filling into an even layer.
If you notice a few small lumps, you can strain the filling through a fine-mesh sieve before pouring it into the crust.
Allow the pie to cool at room temperature for a short time.
Then transfer it to the refrigerator.
❄️ Step 7: Chill the Pie
Refrigerate the chocolate pie for at least 4 hours, preferably longer.
The filling needs time to cool completely and firm up.
For the cleanest slices, chilling the pie overnight is an excellent option.
When you’re ready to serve it, top each slice with a generous spoonful of whipped cream.
Add chocolate shavings or a light dusting of cocoa powder if desired.
❤️ The Formation of the Pie
The beauty of this recipe comes from the way simple ingredients transform during cooking.
The flour provides thickening power, while the egg yolks contribute richness, color, and a luxurious custard texture.
The milk creates the creamy base, and the cocoa powder supplies the deep chocolate flavor.
As the mixture heats, the flour thickens the liquid. The egg yolks are carefully tempered and incorporated, helping create the smooth custard texture.
Finally, butter melts into the warm filling, giving it a silky mouthfeel and subtle richness, while vanilla enhances the overall flavor.
Once chilled, the custard becomes firm enough to slice while remaining wonderfully creamy.
📜 A Little History
Old-fashioned chocolate pies belong to a long tradition of American homemade custard and pudding pies.
Before modern convenience foods became common, home cooks often relied on inexpensive pantry staples to create desserts for their families. Milk, eggs, flour, sugar, cocoa, and butter were ingredients that could be transformed into something special without requiring complicated equipment or expensive ingredients.
Chocolate pudding-style pies became especially beloved because they were comforting, economical, and adaptable.
Recipes varied from household to household. Some families used cornstarch, others used flour. Some added melted chocolate, while others relied entirely on cocoa powder. Some finished their pies with whipped cream, while others preferred a simple meringue topping.
That’s part of what makes an old-fashioned chocolate pie so special: there isn’t necessarily one single version. The recipe often reflects the kitchen and family where it was made.
👩🍳 Traditional Cooking Method
The traditional method is all about patience.
1. Mix the dry ingredients.
Combine sugar, flour, and cocoa powder.
2. Add the milk gradually.
Whisk constantly to create a smooth mixture.
3. Cook gently.
Heat until the mixture thickens.
4. Temper the egg yolks.
Gradually introduce the hot chocolate mixture into the yolks.
5. Return everything to the saucepan.
Cook until thick and creamy.
6. Add butter and vanilla.
These ingredients finish the custard and give it a silky texture.
7. Fill the crust.
Pour the warm filling into the baked pie shell.
8. Chill completely.
Refrigeration allows the filling to set properly.
⭐ Tips for the Best Chocolate Pie
Use good cocoa powder
Because cocoa is the main source of chocolate flavor, choose a good-quality unsweetened cocoa powder.
Don’t rush the custard
Cooking too quickly can cause the milk mixture to scorch or the custard to develop an unpleasant texture.
Whisk constantly
Frequent whisking prevents the flour and cocoa from settling and helps produce a smooth filling.
Temper the eggs carefully
Adding hot filling directly to cold egg yolks can cause them to scramble. Slowly warming the yolks is the secret to a smooth custard.
Let it chill
Don’t cut the pie too early. The filling needs sufficient time to cool and firm.
For perfect slices
Dip a sharp knife in hot water, wipe it dry, and then slice the pie. Repeat between slices for neat, bakery-style pieces.
🍦 Serving Suggestions
This chocolate pie is delicious on its own, but toppings can make it even more special.
Classic
Top with lightly sweetened whipped cream.
Extra Chocolate
Add chocolate curls, chocolate shavings, or a light drizzle of chocolate sauce.
Southern-Style Comfort
Serve with a spoonful of whipped cream and a cup of hot coffee.
Ice Cream
Serve a chilled slice with a small scoop of vanilla ice cream.
Holiday Presentation
Decorate the top with whipped cream rosettes and chocolate curls for an elegant dessert-table centerpiece.
💕 Why Chocolate Lovers Will Love It
Chocolate lovers will appreciate how intensely comforting this pie tastes without being overly complicated.
The cocoa gives the filling a deep chocolate character, while the milk and egg yolks create a rich custard texture. Butter adds another layer of richness, and vanilla makes the chocolate flavor taste even fuller.
Every bite combines flaky crust + creamy chocolate filling + buttery richness.
It’s the kind of dessert where one slice often isn’t enough!
⏰ Recipe at a Glance
Prep Time: 20 minutes
Cooking Time: 20–30 minutes
Chilling Time: At least 4 hours
Total Time: Approximately 5 hours
Yield: 8 slices
Pie Dish: 9-inch pie dish
🥧 Storage
Cover the pie tightly with plastic wrap or place it in an airtight pie container.
Keep refrigerated.
For the best texture and flavor, enjoy within approximately 3–4 days.
Because the filling contains milk and eggs, it should not be left at room temperature for extended periods.
❤️ Final Conclusion
There is something incredibly comforting about an Old-Fashioned Chocolate Pie.
It doesn’t need fancy decorations or complicated ingredients. A simple crust, cocoa, milk, eggs, sugar, flour, butter, and vanilla can create a dessert that feels like it came straight from Grandma’s kitchen.
The secret isn’t complexity—it’s taking your time.
Cook the chocolate filling gently. Temper the egg yolks carefully. Whisk until smooth. Let the finished pie chill until perfectly set.
Then cut yourself a generous slice, add a little whipped cream, pour a cup of coffee, and enjoy.
One bite of this creamy, rich chocolate pie is enough to understand why old-fashioned desserts continue to hold such a special place in our hearts. 🍫🥧❤️
For the chocolate lovers, the homemade-dessert lovers, and everyone who believes the best recipes are the ones shared around the table—this pie is for you.