

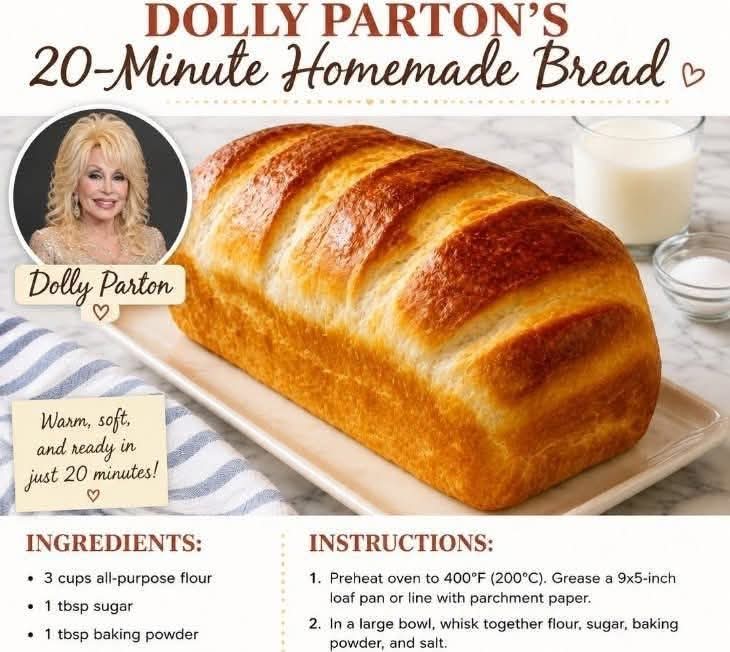
Absolutely! Here’s a long, detailed, website-ready version of the recipe, with a warm country-baking feel. One note: the ingredient list you provided makes a quick bread using baking powder rather than traditional yeast bread, so the 20-minute timing refers to a very fast preparation and bake.
🍞 Dolly’s 20-Minute Homemade Bread
🌾 Introduction
There’s something wonderfully comforting about a loaf of homemade bread coming out of the oven. The smell fills the kitchen, the crust is warm and golden, and even a simple slice with butter can feel like a special treat.
This 20-Minute Homemade Bread is designed for those moments when you want fresh bread without waiting for yeast to rise. Instead of yeast, baking powder provides the lift, making this a simple quick bread that requires only a handful of everyday ingredients.
With flour, baking powder, salt, sugar, and a few basic wet ingredients, you can have a warm homemade loaf on the table remarkably quickly. It’s especially lovely served alongside soups, stews, roasted meats, eggs, or simply spread with butter and jam.
🛒 Ingredients
Dry Ingredients
- 2 cups (250 g) all-purpose flour
- 1 tablespoon baking powder
- 1 teaspoon salt
- 1 tablespoon granulated sugar
Wet Ingredients
- ¾ cup (180 ml) milk, preferably whole or 2%
- 2 tablespoons melted butter or neutral cooking oil
- 1 teaspoon vanilla extract, optional if making a slightly sweet loaf
For the Top
- 1 tablespoon melted butter
- A small pinch of salt, optional
- 1 teaspoon sesame seeds, poppy seeds, or dried herbs, optional
👩🍳 Instructions
Step 1: Prepare the Oven
Preheat your oven to 425°F (220°C).
Lightly grease a small loaf pan, approximately 8 × 4 inches, or line it with parchment paper.
If you prefer a more rustic shape, you can also form the dough into a round loaf and bake it on a parchment-lined baking sheet.
Step 2: Combine the Dry Ingredients
In a large mixing bowl, add:
- Flour
- Baking powder
- Salt
- Sugar
Whisk everything together thoroughly.
This step is important because the baking powder needs to be evenly distributed throughout the flour. If it isn’t mixed well, the bread may rise unevenly.
Step 3: Add the Wet Ingredients
Make a small well in the center of the dry ingredients.
Pour in the milk and melted butter.
Using a wooden spoon, spatula, or your hands, gently mix everything together.
The dough should come together into a soft, slightly sticky mixture.
Important:
Do not overmix the dough.
Quick bread becomes tougher when the flour is worked too much. Mix only until you no longer see large areas of dry flour.
🥣 Method: Forming the Dough
Turn the dough onto a lightly floured work surface.
Gently shape it into a loaf.
You don’t need to knead it like traditional yeast bread. A few gentle folds are enough to bring the dough together.
If the dough feels extremely sticky, sprinkle a little flour over it. Avoid adding too much flour because this can make the finished bread dense and dry.
Place the shaped dough into your prepared loaf pan.
🧈 Method: Preparing the Top
Brush the surface with melted butter.
For a savory version, sprinkle the top with:
- Sesame seeds
- Black pepper
- Dried rosemary
- Italian seasoning
- A little coarse salt
For a sweeter version, leave off the herbs and add a very light sprinkle of sugar instead.
You can also score one shallow line down the center of the loaf with a sharp knife. This gives it a classic homemade-bread appearance as it bakes.
🔥 Method: Baking
Place the bread in the preheated oven.
Bake for approximately 15–20 minutes, depending on the shape and size of your loaf.
The bread is ready when:
- The top is golden brown.
- The loaf looks firm and set.
- A toothpick inserted into the center comes out mostly clean.
- The bottom sounds slightly hollow when tapped.
If the top begins browning too quickly, loosely cover it with aluminum foil for the remaining baking time.
🧊 Cooling the Bread
Remove the bread from the oven and allow it to cool in the pan for about 5 minutes.
Then carefully transfer it to a wire rack.
Let it cool for another 5–10 minutes before slicing.
Although it can be eaten warm, allowing it to rest briefly helps the interior finish setting and makes it easier to slice.
🍓 Serving Ideas
This bread is incredibly versatile.
🧈 Classic Butter Bread
Slice it while still warm and spread generously with butter.
The butter melts into the soft crumb, creating one of the simplest and most satisfying ways to enjoy homemade bread.
🍯 Honey & Butter
Spread with butter and drizzle with honey for a sweet breakfast or afternoon snack.
🍓 Jam & Cream
Serve with strawberry, raspberry, blueberry, or apricot jam.
🧀 Cheesy Bread
Top slices with shredded cheddar, mozzarella, or Parmesan and toast until bubbly.
🍳 Breakfast Toast
Serve alongside scrambled eggs, fried eggs, bacon, sausage, or avocado.
🍲 With Soup
This quick bread makes a wonderful companion to tomato soup, vegetable soup, chicken soup, chili, or hearty stews.
🌿 Savory Herb Variation
For a delicious savory loaf, add:
- 1 teaspoon dried rosemary
- 1 teaspoon dried thyme
- ½ teaspoon garlic powder
- ¼ cup grated Parmesan cheese
Mix the additions into the dry ingredients before adding the milk.
Brush the finished loaf with melted butter immediately after baking.
The result is fragrant, buttery, and perfect for serving with dinner.
🍯 Sweet Cinnamon Variation
For a sweeter breakfast-style loaf, add:
- 2 tablespoons additional sugar
- 1 teaspoon ground cinnamon
- ½ teaspoon vanilla extract
You can also sprinkle the top with cinnamon sugar before baking.
Serve warm with butter, honey, or cream cheese.
📜 A Little History of Quick Bread
Traditional breadmaking generally depends on yeast or another fermentation process. Yeast consumes sugars in dough and produces carbon dioxide, which creates the air pockets responsible for the characteristic rise of yeast bread.
Quick breads developed as a much faster alternative.
Instead of waiting hours for fermentation, recipes using baking powder or baking soda can rise during baking. This makes them especially convenient for home cooks who want something freshly baked without the long preparation associated with traditional yeast loaves.
Baking powder became an important ingredient in American home baking because it simplified the process of making biscuits, muffins, cakes, and quick breads.
That tradition of practical, comforting baking is exactly what makes this style of bread so appealing.
❤️ The Formation of the Bread
The beauty of this recipe is its simplicity.
The flour provides the structure.
The baking powder produces bubbles of carbon dioxide when activated by moisture and heat, helping the dough expand.
The milk adds moisture and tenderness.
Butter contributes richness and flavor.
Salt balances the flavors, while sugar provides a touch of sweetness and helps with browning.
Because there is no lengthy yeast fermentation, the bread has a different texture from a traditional sandwich loaf. Expect something closer to a tender, slightly dense quick bread with a golden exterior.
⭐ Tips for Perfect Homemade Bread
1. Measure the flour carefully
Too much flour can make quick bread dry and heavy.
For the most consistent results, use a kitchen scale and measure approximately 250 g.
2. Don’t overmix
This is one of the most important rules.
Once the ingredients come together, stop mixing.
3. Use fresh baking powder
Old baking powder may not provide enough lift.
4. Preheat the oven completely
The baking powder begins working as the dough heats, so a properly preheated oven is essential.
5. Don’t slice immediately
Give the loaf several minutes to cool before cutting.
6. Serve warm
This bread is at its most comforting when served slightly warm with butter.
🥖 Storage
Once completely cooled, store the bread in an airtight container or tightly wrapped at room temperature for up to 2 days.
For longer storage, wrap individual slices and freeze them.
Frozen slices can be reheated in a toaster or oven whenever you’re craving homemade bread.
💕 Why Bread Lovers Will Love It
Bread lovers will appreciate this recipe because it doesn’t require:
- Yeast
- A long rising time
- Complicated kneading
- Special equipment
- Advanced baking skills
It’s a wonderful recipe for beginners and busy home cooks.
The loaf is simple enough for an ordinary weekday but comforting enough to serve with a family dinner.
☕ Perfect Occasions for This Recipe
Make this quick homemade bread when:
- You need bread in a hurry.
- You ran out of store-bought bread.
- You want something warm for breakfast.
- You’re serving soup or stew.
- You want an easy weekend baking project.
- You need a beginner-friendly recipe.
- You want something delicious to serve with coffee or tea.
🧡 Conclusion
There is something special about homemade bread, even when the recipe is incredibly simple.
This 20-Minute Homemade Bread brings together basic pantry ingredients to create a warm, golden loaf without the long waiting period associated with traditional yeast bread.
Whether you serve it with butter and honey, turn it into breakfast toast, pair it with a steaming bowl of soup, or simply enjoy a warm slice straight from the oven, it’s the kind of recipe that proves homemade doesn’t have to mean complicated.
One bowl, a few simple ingredients, and a little time can turn an ordinary kitchen into the coziest place in the house. 🍞🧈❤️
🍞 A Little Love for Homemade Bread
For the bread lovers, the busy parents, the beginner bakers, and anyone who believes that warm bread makes everything better—this one’s for you.
Bake it, slice it, butter it, and enjoy every warm, comforting bite. ❤️🥖☕