

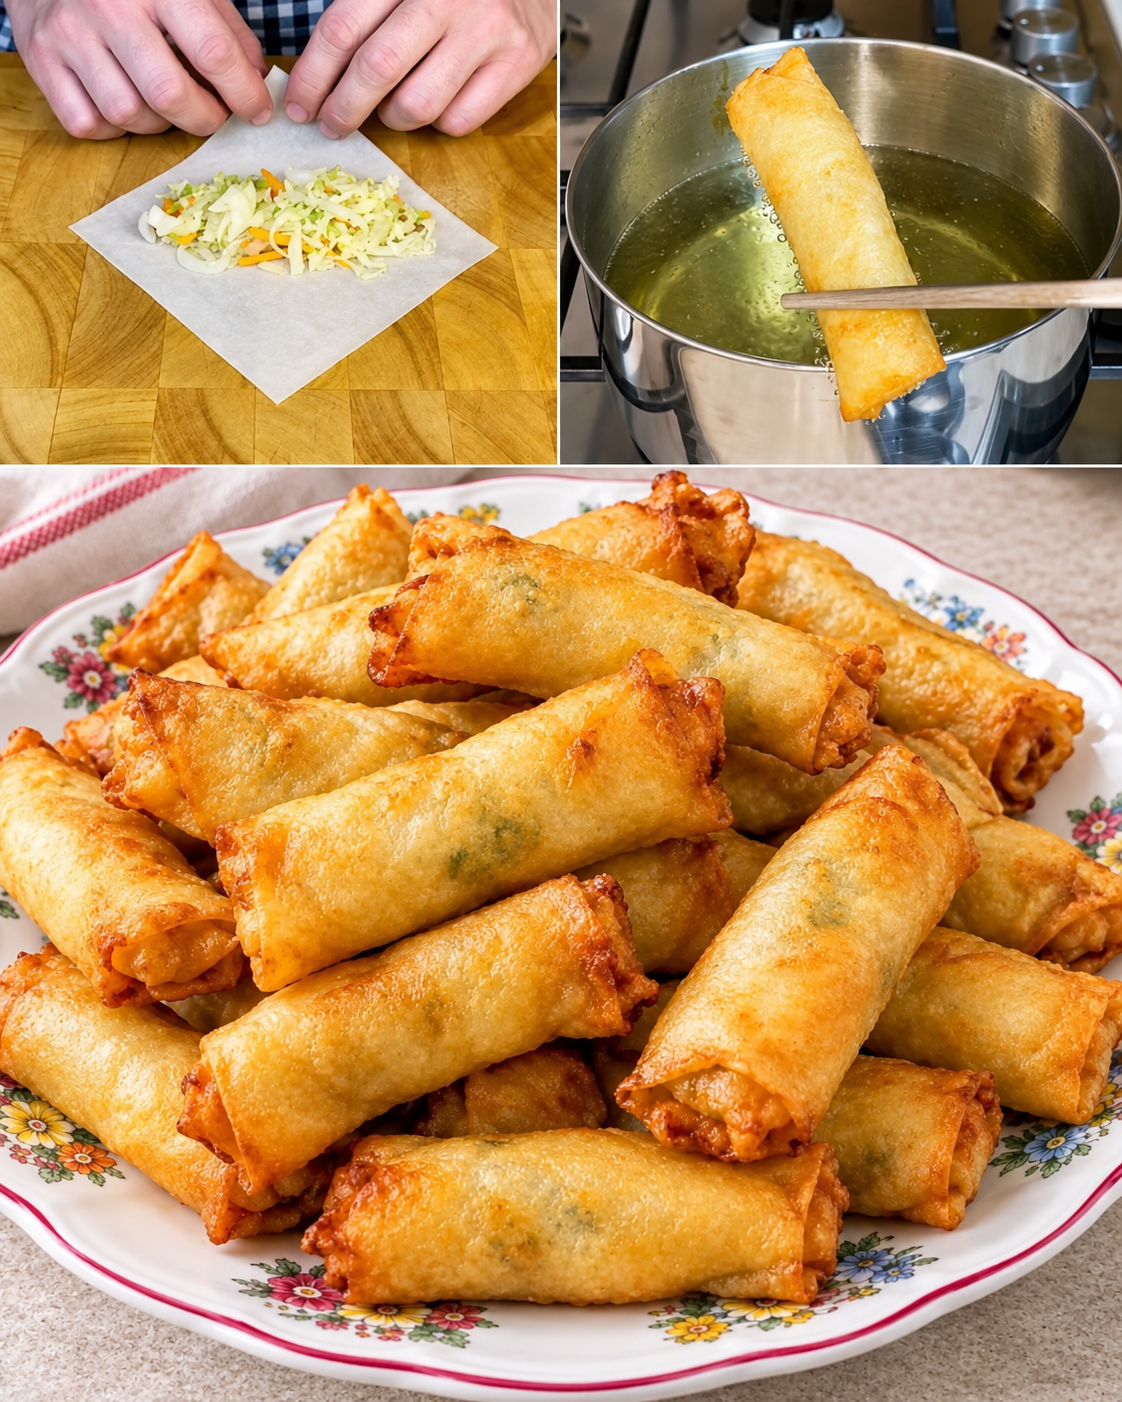
🥢 Crispy Homemade Fried Spring Rolls
Introduction
Crispy homemade fried spring rolls are one of those appetizers that combine everything people love about comfort food: a crunchy golden exterior, a flavorful savory filling, and a delicious contrast between crispness and tenderness.
These spring rolls are filled with a mixture of vegetables, aromatics, and seasoned protein, wrapped in thin pastry sheets, and fried until beautifully golden and crisp. They make an excellent appetizer, snack, party food, or side dish.
The best part about making spring rolls at home is that you can customize the filling. You can make them with chicken, beef, shrimp, pork, tofu, or simply vegetables. You can also adjust the seasonings according to your taste.
🌏 A Little History
Spring rolls have a long culinary history in East and Southeast Asia. Their exact origins and varieties differ from country to country, but the concept of wrapping flavorful fillings in a thin wrapper has become an important part of many Asian cuisines.
In China, spring-roll-style foods have traditionally been associated with springtime celebrations and the Spring Festival. Over time, different regions developed their own versions using local ingredients and cooking methods.
In Southeast Asia, particularly in countries such as Vietnam, the Philippines, Thailand, Indonesia, and Malaysia, fried spring rolls became popular with their own distinctive fillings, wrappers, sauces, and names.
Today, crispy fried spring rolls are enjoyed around the world and are commonly served as appetizers in restaurants and at family gatherings.
🥕 Ingredients
For the Filling
- 1 tablespoon vegetable oil
- 450 g ground chicken, pork, beef, or finely chopped chicken
- 3 cloves garlic, finely minced
- 1 tablespoon fresh ginger, grated
- 1 small onion, finely diced
- 2 cups finely shredded cabbage
- 1 large carrot, julienned or grated
- 1 cup bean sprouts
- ½ cup finely chopped green onions
- 1 tablespoon soy sauce
- 1 tablespoon oyster sauce
- 1 teaspoon sesame oil
- ½ teaspoon ground black pepper
- ½ teaspoon salt, or to taste
- ½ teaspoon sugar
- ½ teaspoon chili flakes, optional
For Wrapping
- 12–16 spring roll wrappers
- 2 tablespoons all-purpose flour
- 3 tablespoons water
For Frying
- Vegetable oil, enough for deep frying
🧄 Optional Flavor Additions
For an even more flavorful filling, you can add:
- ½ teaspoon five-spice powder
- 1 tablespoon rice vinegar
- 1 teaspoon chili garlic sauce
- Finely chopped mushrooms
- Finely chopped bell pepper
- Water chestnuts
- Chopped cilantro
- A small amount of grated garlic
- Finely chopped shrimp
The filling should be flavorful but not watery.
👩🍳 Instructions
Step 1: Prepare the Vegetables
Wash and prepare all of your vegetables.
Shred the cabbage very finely and grate or julienne the carrot. Chop the onion and green onions, and mince the garlic and ginger.
Keeping the vegetables relatively small makes the spring rolls easier to roll and prevents the wrappers from tearing.
Step 2: Cook the Protein
Heat 1 tablespoon of vegetable oil in a large skillet or wok over medium-high heat.
Add the ground meat.
Cook for approximately 5–7 minutes, breaking it apart with a wooden spoon as it cooks.
Continue cooking until the meat is completely cooked and no longer pink.
If there is excessive liquid or fat in the pan, drain it.
Step 3: Add the Aromatics
Add the chopped onion, garlic, and ginger.
Stir-fry for approximately 1–2 minutes.
You should be able to smell the garlic and ginger becoming fragrant.
Be careful not to burn the garlic.
Step 4: Add the Vegetables
Add the shredded cabbage, carrot, and bean sprouts.
Increase the heat slightly and stir-fry everything together.
Cook for approximately 3–5 minutes.
The vegetables should become slightly tender while retaining some texture.
Do not overcook them.
A slightly crisp vegetable filling produces a much better spring roll.
Step 5: Season the Filling
Add:
- Soy sauce
- Oyster sauce
- Sesame oil
- Black pepper
- Salt
- Sugar
- Chili flakes, if desired
Stir everything thoroughly.
Taste the filling and adjust the seasoning if necessary.
⭐ The Most Important Step: Remove Excess Moisture
This step is essential for crispy spring rolls.
If the filling is wet, the wrappers can become soggy and may burst during frying.
Transfer the cooked filling to a large plate, tray, or bowl and allow it to cool completely.
If necessary, drain any excess liquid.
Why?
A dry, cooled filling helps keep the wrappers crispy and prevents steam from becoming trapped inside.
🥢 Step 6: Prepare the Wrapper
Place one spring roll wrapper on a clean surface.
Position it like a diamond, with one corner pointing toward you.
Place approximately 2–3 tablespoons of filling near the bottom-center portion of the wrapper.
Do not overfill.
🌯 Step 7: Roll the Spring Roll
Fold the bottom corner over the filling.
Tuck it underneath the filling and gently pull the roll toward yourself to make it tight.
Fold the left and right corners toward the center.
Continue rolling upward.
When you reach the final corner, brush a little flour-and-water paste along the edge.
Finish rolling and gently press the seam closed.
Place the finished spring roll seam-side down.
Repeat with the remaining wrappers and filling.
🧴 Homemade Sealing Paste
Mix:
- 2 tablespoons flour
- 3 tablespoons water
Stir until smooth.
The mixture should have the consistency of a thick paste.
Use it to seal the final edge of each spring roll.
🔥 Step 8: Heat the Oil
Pour enough vegetable oil into a deep, heavy-bottomed pot to allow the spring rolls to be comfortably submerged.
Heat the oil to approximately 175–180°C (350–355°F).
If you don’t have a thermometer, place a small piece of wrapper into the oil.
It should immediately begin bubbling and frying without burning rapidly.
🍳 Step 9: Fry the Spring Rolls
Carefully place several spring rolls into the hot oil.
Do not overcrowd the pot.
Fry them for approximately 3–5 minutes, turning occasionally, until they become:
- Golden brown
- Crisp
- Evenly cooked
The exact cooking time will depend on the size of the spring rolls and the temperature of the oil.
🧺 Step 10: Drain
Remove the spring rolls using tongs or a slotted spoon.
Place them on a wire rack positioned over a baking tray.
This is better than placing them directly onto paper towels because air can circulate underneath, helping preserve their crispness.
Allow them to cool for a few minutes before serving.
🔥 Double-Frying Method for Extra Crispiness
If you want exceptionally crispy spring rolls, try double frying.
First Fry
Fry the spring rolls at approximately 160–165°C (320–330°F) for about 2–3 minutes.
They should become lightly golden but not deeply browned.
Remove them and allow them to rest for several minutes.
Second Fry
Increase the oil temperature to approximately 180°C (350°F).
Return the spring rolls to the oil.
Fry for another 1–2 minutes until deeply golden and extremely crispy.
This method creates a wonderfully crunchy exterior.
💨 Alternative: Air Fryer Method
If you prefer using an air fryer:
- Lightly brush or spray the spring rolls with oil.
- Place them in the air fryer without overcrowding.
- Cook at approximately 190°C (375°F).
- Air fry for about 10–15 minutes.
- Turn them halfway through cooking.
- Continue until golden and crisp.
Cooking times vary between air fryers, so keep an eye on them toward the end.
🔥 Oven-Baked Method
For a lighter version:
- Preheat the oven to 220°C (425°F).
- Place the spring rolls on a baking sheet lined with parchment.
- Lightly brush them with oil.
- Bake for approximately 18–25 minutes.
- Turn them halfway through.
- Remove once golden and crispy.
The oven version won’t have exactly the same deep-fried texture, but it is still delicious.
🥣 Delicious Dipping Sauce
Sweet Chili Soy Sauce
Ingredients
- 3 tablespoons sweet chili sauce
- 1 tablespoon soy sauce
- 1 tablespoon rice vinegar
- 1 teaspoon sesame oil
- 1 teaspoon lime juice
- 1 small garlic clove, finely minced
- 1 teaspoon chopped green onion
Method
Combine everything in a small bowl.
Mix well.
Taste and adjust the balance of sweet, salty, sour, and spicy flavors.
Serve alongside the hot spring rolls.
🌶️ Spicy Garlic Dipping Sauce
For people who love heat, combine:
- 3 tablespoons soy sauce
- 1 tablespoon rice vinegar
- 1 teaspoon chili oil
- 1 teaspoon honey
- 1 minced garlic clove
- ½ teaspoon sesame oil
- Sliced green onions
Mix everything together and serve immediately.
🍽️ Serving Ideas
Crispy spring rolls can be served as an appetizer or snack alongside:
- Sweet chili sauce
- Soy dipping sauce
- Garlic sauce
- Chili oil
- Peanut sauce
- Fresh lime
- Pickled vegetables
- Cucumber salad
- Fried rice
- Noodles
- Stir-fried vegetables
For a party, arrange the spring rolls on a large platter with several dipping sauces in the center.
❤️ What Spring Roll Lovers Enjoy Most
Spring-roll lovers usually appreciate the contrast between the delicate, crunchy wrapper and the savory, juicy filling.
The best spring rolls should be:
🥢 Crispy outside
The wrapper should crackle when you bite into it.
🥕 Flavorful inside
The filling should have plenty of garlic, ginger, vegetables, and savory seasoning.
💧 Not soggy
Excess moisture is one of the biggest enemies of crispy spring rolls.
🌯 Tightly rolled
A tight roll prevents the filling from escaping during frying.
🔥 Properly fried
Oil that is too cool produces greasy spring rolls, while oil that is too hot can burn the wrapper before the filling is properly heated.
⭐ Professional Tips for Perfect Spring Rolls
1. Don’t overfill them
Too much filling makes them difficult to roll and increases the chance of bursting.
2. Cool the filling first
Never wrap extremely hot filling.
Steam can make the wrapper soft and difficult to handle.
3. Keep the wrappers covered
Spring roll wrappers dry out quickly.
Keep unused wrappers underneath a slightly damp, clean kitchen towel.
4. Avoid watery vegetables
If using vegetables that release lots of water, cook them until their moisture evaporates.
5. Don’t overcrowd the oil
Adding too many spring rolls at once dramatically lowers the oil temperature.
6. Maintain the oil temperature
Aim for approximately 175–180°C / 350–355°F.
7. Use a wire rack
It helps prevent the bottoms from becoming soggy.
8. Don’t stack them immediately
Steam trapped between hot spring rolls can soften the crispy wrappers.
🧊 Make-Ahead and Freezing Method
Spring rolls are excellent for preparing ahead of time.
Prepare and roll the spring rolls as usual.
Place them in a single layer on a parchment-lined tray.
Make sure they aren’t touching.
Freeze them until solid.
Then transfer them to a freezer-safe container or bag.
You can fry them directly from frozen.
Do not thaw them completely before frying because thawing can make the wrappers wet and more likely to break.
When frying frozen spring rolls, use slightly lower heat initially and allow extra cooking time so the filling heats through.
🥗 Nutritional Information
The nutritional values will vary depending on the meat, wrappers, amount of oil absorbed, and serving size.
Approximate nutrition per 2 fried spring rolls:
- Calories: 220–300 kcal
- Protein: 10–15 g
- Carbohydrates: 22–30 g
- Fat: 10–17 g
- Fiber: 2–3 g
- Sugar: 2–4 g
- Sodium: 500–800 mg
Using lean chicken and controlling the amount of oil can reduce the calories and fat.
Air frying or baking can also significantly reduce the amount of oil used.
🍽️ Recipe Formation at a Glance
Preparation: 25–35 minutes
Cooking: 15–25 minutes
Total: Approximately 45–60 minutes
Yield: 12–16 spring rolls
Difficulty: Moderate
Cuisine: Asian-inspired
Best served: Hot and crispy
🏆 Conclusion
Homemade crispy fried spring rolls are a fantastic combination of texture, flavor, and versatility. The golden wrapper provides a satisfying crunch while the vegetable-and-protein filling delivers savory, aromatic flavor.
The key to making restaurant-quality spring rolls at home is not complicated: keep the filling relatively dry, cool it before wrapping, roll tightly, seal properly, and maintain the correct frying temperature.
Whether you choose chicken, beef, shrimp, pork, tofu, or a completely vegetarian filling, these spring rolls can easily become a favorite homemade appetizer.
Serve them hot with sweet chili sauce, garlic dipping sauce, or your favorite spicy condiment, and enjoy that irresistible first crispy bite. 🥢✨