

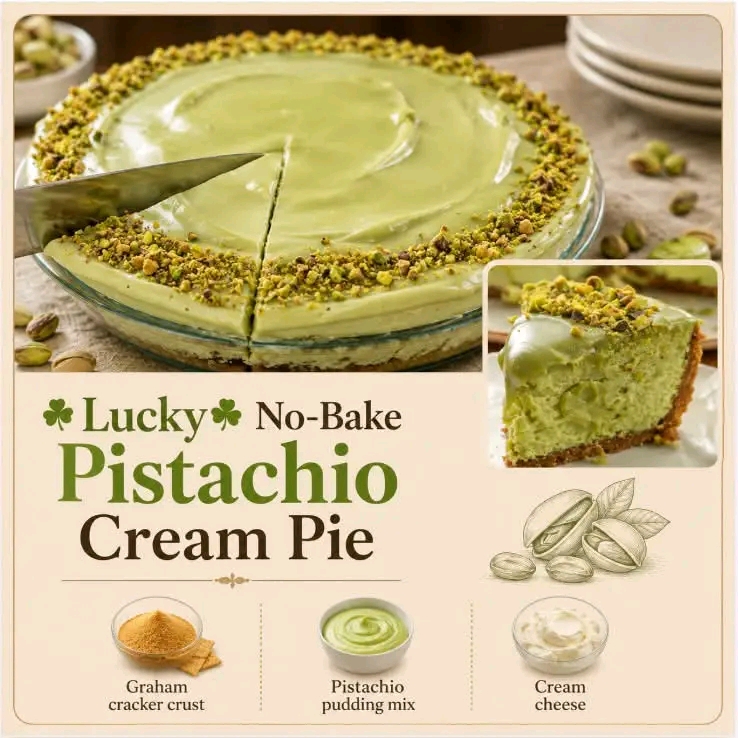
🥧💚 Lucky No-Bake Pistachio Cream Pie
Introduction
This Lucky No-Bake Pistachio Cream Pie is a wonderfully creamy, cool, and easy dessert that comes together without turning on the oven. With a buttery graham cracker crust, silky pistachio pudding, tangy cream cheese, sweetened condensed milk, fluffy whipped topping, and crushed pineapple, every bite is rich, refreshing, and packed with flavor.
The beautiful pale-green color makes this pie especially fun for spring celebrations, St. Patrick’s Day gatherings, Easter tables, potlucks, birthdays, or simply a weekend dessert when you want something sweet without spending hours in the kitchen.
The chopped pistachios sprinkled over the top provide a lovely nutty crunch, while the pineapple adds a subtle tropical freshness that keeps the creamy filling from feeling too heavy.
Ingredients
For the Crust
- 1 prepared 9-inch graham cracker crust
- Optional: 2 tablespoons finely chopped pistachios for the bottom or sides
For the Pistachio Cream Filling
- 1 package pistachio instant pudding mix, approximately 3.4 ounces
- 1 cup cold milk
- 8 ounces cream cheese, softened
- 1 can sweetened condensed milk, approximately 14 ounces
- 1 container whipped topping, approximately 8 ounces, thawed
- 1 cup crushed pineapple, well drained
- ½ cup chopped pistachios
For the Topping
- Additional whipped topping
- 2–3 tablespoons chopped pistachios
- Optional: a few maraschino cherries
- Optional: extra crushed pineapple, well drained
- Optional: white chocolate curls
Instructions
Step 1: Prepare the Ingredients
Before beginning, soften the cream cheese at room temperature. This is important because softened cream cheese blends much more easily and helps create a smooth, lump-free filling.
Drain the crushed pineapple very well. Excess pineapple juice can make the filling too loose, so press the pineapple gently against a fine-mesh strainer or use a clean paper towel to remove additional moisture.
Thaw the whipped topping according to the package instructions.
Step 2: Make the Pistachio Pudding
Pour the cold milk into a large mixing bowl.
Add the pistachio instant pudding mix and whisk for approximately 1–2 minutes, until the mixture begins to thicken.
Let it stand for a few minutes while preparing the cream cheese mixture.
The cold milk is important because instant pudding is designed to thicken properly when mixed with chilled liquid.
Step 3: Prepare the Cream Cheese Mixture
Place the softened cream cheese in a large bowl.
Beat it until smooth and creamy.
Slowly add the sweetened condensed milk while continuing to mix. Scrape down the sides of the bowl as needed.
Continue mixing until the cream cheese and condensed milk form a smooth, creamy mixture.
Avoid adding the condensed milk all at once if your cream cheese is still slightly firm, as this can sometimes leave small lumps.
Step 4: Combine the Pistachio Mixture
Add the prepared pistachio pudding to the cream cheese mixture.
Beat or whisk gently until everything is thoroughly combined.
The filling should become smooth and beautifully pale green with a pleasant pistachio aroma.
Step 5: Fold in the Whipped Topping
Add the thawed whipped topping.
Using a rubber spatula, gently fold it into the pistachio mixture rather than aggressively stirring.
Folding helps preserve the light, fluffy texture of the whipped topping and gives the finished pie its soft mousse-like consistency.
Step 6: Add the Pineapple
Gently fold in the well-drained crushed pineapple.
The pineapple brings a little acidity and tropical sweetness to the dessert. Make sure it has been drained thoroughly before adding it.
Step 7: Add the Pistachios
Fold in approximately ½ cup of chopped pistachios.
For the best texture, chop the pistachios fairly small. You want little pieces throughout the filling without making the pie difficult to slice.
Method
Building the Pie
Spoon the finished pistachio filling into the prepared graham cracker crust.
Use a spatula to spread the filling evenly from the center toward the edges.
Smooth the top, or create decorative swirls with the back of a spoon.
Sprinkle additional chopped pistachios over the surface.
If desired, add small dollops or swirls of whipped topping around the edge.
A few cherries can also be placed on top for a classic colorful finish.
Chilling the Pie
Cover the pie loosely with plastic wrap or foil.
Place it in the refrigerator for at least 4–6 hours, preferably overnight.
This chilling time allows the filling to become firm enough to slice cleanly while giving the pistachio, pineapple, cream cheese, and condensed milk flavors time to blend.
For the best results, don’t rush this step.
History and Inspiration
Pistachio desserts have long been popular because pistachios provide both a distinctive nutty flavor and a naturally appealing green color.
Pistachio pudding became especially useful in American home baking because it offered an easy way to create creamy desserts without having to prepare a traditional custard from scratch.
No-bake pies became beloved for a similar reason: they are simple, economical, and convenient. Instead of making pastry dough, preparing a complicated filling, and baking the entire dessert, home cooks could combine convenient ingredients, pour everything into a prepared crust, and let the refrigerator do the work.
The combination of pistachio pudding, cream cheese, whipped topping, and sweetened condensed milk creates the rich foundation commonly associated with vintage-style refrigerator desserts. Adding pineapple gives this version a bright tropical note and a little fruity contrast.
Formation of the Pie
The texture of this pie develops in several stages.
First, the instant pistachio pudding thickens the milk and provides the characteristic pistachio flavor and green color.
Next, softened cream cheese gives the filling structure and a slight tang that balances the sweetness of the condensed milk.
The sweetened condensed milk contributes richness, sweetness, and body.
Whipped topping is then folded into the mixture to create a lighter, airy texture.
Finally, the crushed pineapple and chopped pistachios provide contrast—soft fruit and creamy filling against little pieces of crunchy nuts.
After several hours in the refrigerator, all of these ingredients come together into a sliceable, creamy dessert.
Helpful Tips for Perfect Results
Drain the pineapple well
This is one of the most important tips. Too much pineapple juice can make the filling soft and prevent the pie from setting properly.
Use softened cream cheese
Room-temperature cream cheese blends much more smoothly than cold cream cheese.
Keep the milk cold
Cold milk helps instant pudding thicken properly.
Fold instead of overmixing
Once the whipped topping is added, fold gently to keep the filling light and fluffy.
Give it enough refrigerator time
For the cleanest slices, refrigerate the pie for at least 4–6 hours. Overnight is even better.
Chill before decorating
If you’re using decorative whipped topping, you can add it before chilling or shortly before serving.
Serving Suggestions
For an especially beautiful presentation, slice the chilled pie with a sharp knife.
Wipe the knife clean between slices for neat edges.
Serve each piece with:
- A dollop of whipped topping
- Chopped pistachios
- A small cherry
- A few pineapple pieces
- White chocolate curls
- A light sprinkle of crushed graham crackers
This pie is particularly delicious when served very cold.
Make-Ahead Method
This is an excellent make-ahead dessert.
Prepare the entire pie the day before serving, cover it well, and refrigerate overnight.
The extra chilling time allows the filling to firm up and the flavors to develop.
If making it more than one day ahead, keep it tightly covered in the refrigerator and add delicate decorations shortly before serving.
Storage
Store leftover pie covered in the refrigerator.
It is best enjoyed chilled and should not be left at room temperature for extended periods because the filling contains dairy ingredients.
For the best texture and flavor, enjoy within several days.
Variations
Pineapple-Coconut Pistachio Pie
Add ½ cup sweetened shredded coconut to the filling for an even more tropical flavor.
Chocolate Pistachio Pie
Add a thin layer of chocolate cookie crumbs beneath the pistachio filling or use a chocolate-cookie crust.
Extra-Nutty Pistachio Pie
Increase the chopped pistachios and sprinkle toasted pistachios over the finished pie.
Lemon Pistachio Pie
Add a small amount of fresh lemon zest to brighten the pistachio and pineapple flavors.
Coconut Cream Version
Replace part of the milk with chilled coconut milk for a richer tropical twist.
Why Everyone Loves It
This pie checks all the boxes for an easy homemade dessert:
No oven.
No complicated pastry.
Minimal preparation.
Creamy texture.
Beautiful color.
Sweet tropical flavor.
Crunchy pistachios.
It’s the kind of dessert that looks like you spent much longer making it than you actually did.
Conclusion
Lucky No-Bake Pistachio Cream Pie is a cheerful, creamy dessert that brings together some wonderfully nostalgic ingredients in one easy recipe. The graham cracker crust provides a buttery, crunchy foundation, while the pistachio pudding and cream cheese create a smooth and rich filling.
Sweetened condensed milk adds irresistible sweetness, whipped topping keeps everything light and fluffy, and crushed pineapple brings a refreshing fruity contrast. Finally, chopped pistachios add the perfect finishing touch.
Whether you’re preparing it for a holiday, family gathering, church potluck, summer celebration, or simply craving an easy refrigerator dessert, this pie is a wonderful choice.
💚 For Pistachio Pie Lovers
If you love creamy pies, pistachio desserts, pineapple treats, and old-fashioned no-bake recipes, this is one to keep in your recipe collection.
One chilled slice is creamy, nutty, fruity, sweet, and wonderfully refreshing—and it’s exactly the kind of dessert that can disappear from the dessert table surprisingly fast.
Chill it, slice it, serve it, and enjoy every creamy green bite! 🥧💚