

Bread in a Bag — Easy Homemade Bread Without the Mess
Introduction
There is something wonderfully comforting about a loaf of homemade bread. The smell of yeast, the warmth of the oven, and that first slice of freshly baked bread can make an ordinary day feel special. But many people avoid making bread because they imagine a kitchen covered in flour and a long, complicated kneading process.
Bread in a Bag is a fun and simple way to make homemade bread while keeping the mess to a minimum. Instead of mixing and kneading everything directly on the counter, much of the dough preparation happens inside a large resealable plastic bag.
It is an especially enjoyable recipe for beginners and families because you can feel the dough developing right inside the bag. Once the dough comes together, it is transferred to a work surface for its final shaping and rising before being baked into a golden, fragrant loaf.
The finished bread has a soft interior, a lightly crisp crust, and that unmistakable homemade flavor that store-bought bread simply cannot replace.
Ingredients
For the Bread
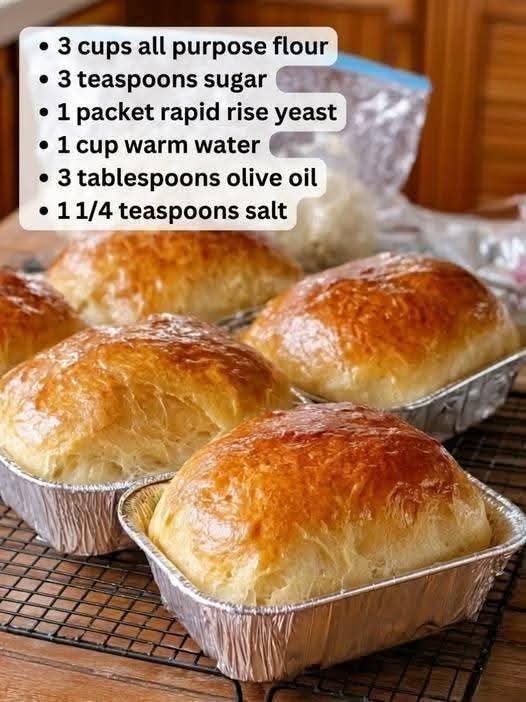
- 3 cups all-purpose flour
- 3 teaspoons granulated sugar
- 1 packet rapid-rise yeast
- 1 cup warm water, approximately 110°F (43°C)
- 3 tablespoons olive oil
- 1 1/4 teaspoons salt
Equipment
- 1 large heavy-duty resealable plastic bag
- Measuring cups and spoons
- Large mixing bowl, optional
- Clean work surface
- Loaf pan or baking sheet
- Kitchen towel
- Pastry brush, optional
Instructions
Step 1: Prepare the Yeast Mixture
Begin with a large, sturdy resealable plastic bag.
Add:
- 1 cup of the flour
- 3 teaspoons sugar
- 1 packet rapid-rise yeast
Seal the bag carefully and shake it gently until the dry ingredients are evenly combined.
Add the warm water and olive oil.
The water should be warm but not hot. Around 110°F (43°C) is ideal. Water that is excessively hot can damage yeast, while water that is too cool may slow down the dough’s development.
Seal the bag again, leaving a little air inside, and gently squeeze and knead the mixture through the outside of the bag.
Step 2: Add More Flour
Add another cup of flour to the bag along with the salt.
Seal the bag and continue squeezing and mixing the dough through the plastic.
When the flour has been absorbed, add the remaining cup of flour gradually.
Continue working the dough inside the bag until it becomes a soft, cohesive dough.
The dough should be soft and slightly tacky but not excessively wet.
If it seems extremely sticky, add a small amount of flour, a tablespoon at a time.
The No-Mess Kneading Method
This is the part that makes the recipe so much fun.
Keep the dough inside the sealed bag and gently knead it by pressing, folding, and turning it with your hands.
Work the dough for approximately 5–8 minutes, or until it becomes smoother and more elastic.
You do not need to knead aggressively. Gentle, consistent movement is enough.
The dough should gradually transform from a rough mixture into a smooth, stretchy ball.
Once it has developed a soft and elastic texture, remove it from the bag.
First Rise
Lightly grease a clean bowl with a little olive oil.
Place the dough inside and turn it once so the surface is lightly coated.
Cover the bowl with a clean kitchen towel or plastic wrap.
Place the bowl somewhere warm and draft-free.
Allow the dough to rise for approximately 45–60 minutes, or until it has noticeably increased in size.
Depending on the temperature of your kitchen, the rising time may vary.
A warmer kitchen generally means faster rising, while a cooler room may require more time.
Shaping the Bread
Once the dough has risen, gently press it down to release some of the excess air.
Transfer it to a lightly floured surface.
Shape the dough into a loaf.
For a traditional sandwich loaf, flatten the dough gently into a rectangle, fold the sides toward the center, and then roll it tightly from one end to the other.
Place the shaped dough into a lightly greased loaf pan with the seam facing downward.
You can also shape the dough into a round loaf and place it on a lightly greased or parchment-lined baking sheet.
Second Rise
Cover the shaped dough with a clean towel.
Allow it to rise again for approximately 30–45 minutes.
The dough should become noticeably puffier.
Do not worry if it does not perfectly double in size. The important thing is that it looks lighter and more expanded.
Baking Method
Preheat your oven to 375°F (190°C).
Once the dough has finished its second rise, place it in the preheated oven.
Bake for approximately 25–35 minutes, depending on the shape and size of your loaf.
The bread should develop a beautiful golden-brown crust.
A good indication that the bread is finished is a hollow sound when you gently tap the bottom of the loaf.
If the top begins browning too quickly, loosely cover it with aluminum foil during the latter part of baking.
Cooling the Bread
This step is important.
Remove the loaf from the oven and allow it to cool in the pan for several minutes.
Then carefully transfer it to a wire rack.
Allow the bread to cool before slicing.
Although it may be tempting to cut into it immediately, allowing homemade bread to cool gives the interior time to finish setting.
Once cool enough to handle, slice it with a serrated bread knife.
Helpful Tips for Perfect Bread
Use the correct water temperature
The water should be warm rather than hot. Around 110°F is a good target for this recipe.
Measure flour carefully
Too much flour can produce a dense loaf. If possible, spoon the flour into your measuring cup and level it rather than packing it tightly.
Don’t rush the rising process
Yeast needs time to work. If your kitchen is cool, your dough may need longer than the suggested rising time.
Avoid over-flouring
The dough should remain soft. Adding excessive flour can make the finished bread heavy.
Let the bread cool
Cooling helps the crumb develop its final texture and makes slicing much easier.
A Little History of Homemade Bread
Bread is one of the oldest prepared foods in human history. Long before modern supermarkets, packaged yeast, and electric mixers, people were combining grains and water to create simple breads.
For generations, bread making was a regular part of household cooking. Families often developed their own methods based on the ingredients, equipment, and traditions available to them.
As baking became more convenient, recipes evolved to fit modern kitchens. The Bread in a Bag method is a playful example of that evolution: it keeps the basic principles of bread making while reducing the amount of flour and dough spread across the kitchen counter.
The technique is particularly appealing to home cooks who want to introduce children or beginners to the process of making bread.
Why Bread in a Bag Works
The recipe follows the same basic principles as many traditional yeast breads.
The yeast helps the dough rise, while flour provides the structure. Water hydrates the flour, and kneading helps develop gluten, which gives the bread its elasticity and structure.
Sugar provides a little sweetness and also supports yeast activity, while olive oil contributes tenderness and richness.
The salt balances the flavor and helps control yeast activity.
Even though the mixing happens inside a plastic bag, the fundamental bread-making process remains the same:
Mix → Knead → Rise → Shape → Rise → Bake → Cool
That simple sequence is what turns a handful of everyday ingredients into a beautiful loaf of bread.
Formation and Shaping
The formation of the loaf is completely flexible.
For a classic sandwich bread, shape the dough into a rectangle and roll it tightly into a cylinder.
For rustic bread, form the dough into a round boule.
For smaller portions, divide the dough into several pieces and shape them into individual rolls.
You can even create small dinner rolls for a family meal.
The shape you choose will affect the baking time, so smaller breads should be checked earlier than a full loaf.
Serving Ideas
Fresh Bread in a Bag is delicious in countless ways.
Serve warm slices with:
- Butter
- Honey
- Jam
- Peanut butter
- Cream cheese
- Scrambled eggs
- Cheese
- Soup
- Stews
- Roasted meats
- Sandwich fillings
For breakfast, toast a slice and spread it with butter and your favorite jam.
For lunch, use it to make a simple grilled cheese or hearty sandwich.
For dinner, serve warm slices alongside soup or stew to soak up every last bit of flavorful broth.
And if you have leftovers, the bread makes wonderful toast the next morning.
Storage
Once completely cooled, store the bread in an airtight container or bread bag at room temperature.
For the best texture, enjoy it within a few days.
If you want to keep it longer, slice the loaf and freeze the slices in a freezer-safe bag. Individual slices can then be removed as needed and toasted directly from frozen.
Recipe Summary
Prep: Approximately 15–20 minutes
First rise: 45–60 minutes
Second rise: 30–45 minutes
Bake: 25–35 minutes
Oven: 375°F (190°C)
Yield: 1 loaf
Final Thoughts
Bread in a Bag proves that homemade bread does not have to be intimidating.
There is no complicated mixer required, and the bag helps keep the early stages of preparation contained. The process is simple enough for beginners but still gives you the satisfaction of creating a real loaf of bread from scratch.
Once that golden loaf comes out of the oven and fills your kitchen with the aroma of freshly baked bread, you may wonder why you waited so long to try it.
It is simple, comforting, economical, and perfect for sharing.
For the Love of Homemade Bread ❤️
There is something special about making bread with your own hands.
Maybe it is the smell that fills the kitchen. Maybe it is the warm slice spread with butter. Or maybe it is simply knowing that a few humble ingredients became something delicious because you took the time to make it.
Whether you’re an experienced baker or making your very first loaf, Bread in a Bag is a fun recipe to keep in your collection.
So grab your flour, warm up the oven, and give this easy homemade loaf a try.
And if you love simple homemade recipes, share this one with another bread lover. ❤️
Happy baking, and enjoy every warm, delicious slice!