

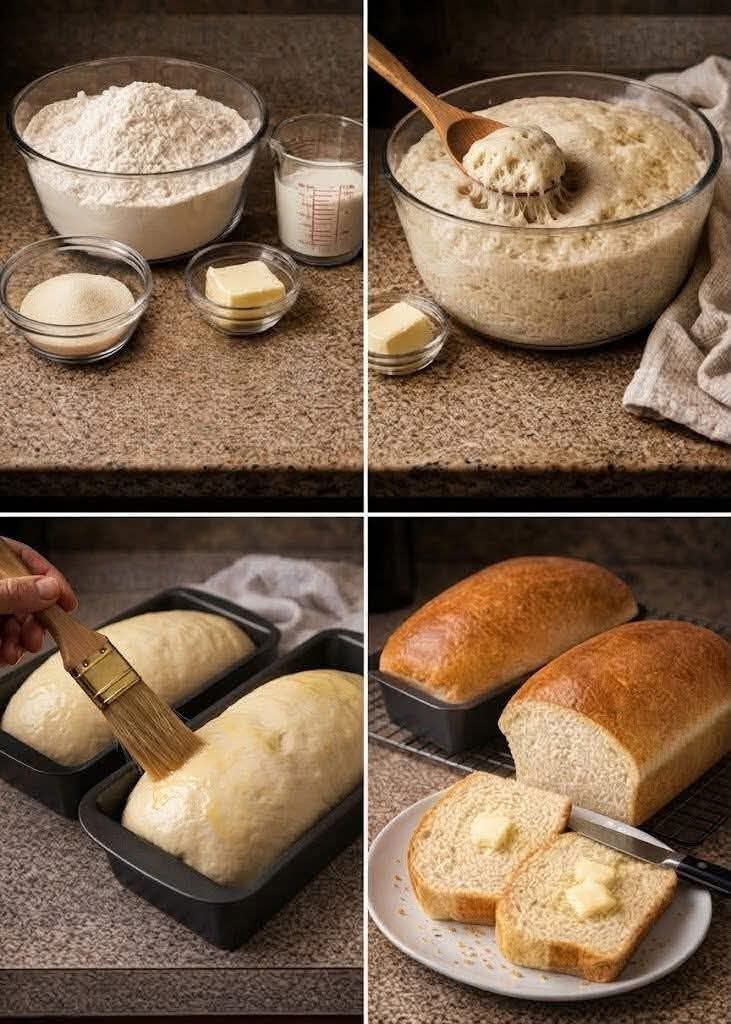
Absolutely! Here’s a long, polished, website-style version of the homemade bread recipe, with a warm introduction, ingredients, detailed method, a little history, shaping and baking tips, serving ideas, and a delicious conclusion.
🍞 Foolproof Homemade Bakery-Style Bread
Introduction
There is something truly special about homemade bread. The moment that warm, buttery aroma begins filling the kitchen, everyone seems to find an excuse to come closer to the oven. This simple homemade bread recipe creates a soft, tender loaf with a beautifully golden crust and a fluffy center that is perfect for sandwiches, toast, breakfast, or simply tearing apart while it is still warm.
If you have always thought that baking bread was complicated, this is a wonderful recipe to start with. The ingredients are simple, the method is straightforward, and the dough is wonderfully forgiving. Once you make it yourself, you may find yourself wondering why you ever bought ordinary bread from the store!
And of course, the best way to enjoy it is with warm bread and plenty of butter. 🧈❤️
Ingredients
For the Bread Dough
- 1 cup warm milk
- ½ cup warm water
- 2¼ teaspoons active dry yeast
- ¼ cup granulated sugar
- 2 tablespoons butter, melted
- 1 teaspoon salt
- 4 to 4½ cups all-purpose flour
For Finishing
- 1–2 tablespoons melted butter, optional
- Extra flour for dusting the work surface
- Butter, honey, jam, or your favorite spread for serving
A Little History of Homemade Bread
Bread is one of the oldest prepared foods in the world. For thousands of years, people have combined grains, water, and other simple ingredients to create nourishing loaves.
Yeast-leavened bread became especially beloved because fermentation gives bread its characteristic aroma, flavor, and airy texture. Over generations, homemade bread became an important part of family kitchens, with recipes passed from parents and grandparents to the next generation.
This recipe follows that same comforting tradition while keeping the process simple enough for a modern kitchen. The combination of warm milk, yeast, butter, and flour creates a soft loaf with a familiar homemade character.
Preparation
Before beginning, gather all your ingredients and make sure your milk and water are warm rather than hot. Very hot liquid can damage the yeast, while comfortably warm liquid helps activate it.
Allow your butter to melt and cool slightly before adding it to the dough.
Lightly flour your work surface and prepare a clean mixing bowl for the dough.
Step-by-Step Instructions
Step 1: Activate the Yeast
Pour the warm milk and warm water into a large mixing bowl.
Add the sugar and active dry yeast. Stir gently to combine.
Let the mixture stand for approximately 5–10 minutes.
The yeast should begin becoming foamy or bubbly. This is a good indication that it is active.
If there is no activity at all, check that your yeast is fresh and that the liquid was not too hot or too cold.
Step 2: Add the Butter and Salt
Once the yeast has activated, stir in the melted butter and salt.
Mix gently until everything is evenly incorporated.
The butter adds richness and helps create a soft, tender crumb, while the salt balances the sweetness and develops the flavor of the bread.
Step 3: Add the Flour
Begin adding the flour gradually.
Start with about 4 cups, adding it one cup at a time while stirring.
As the flour is incorporated, the mixture will become thicker and eventually form a soft dough.
If the dough remains extremely sticky, add a little more flour, a tablespoon or two at a time.
You may not need the entire 4½ cups. The goal is a soft dough that is slightly tacky but not excessively sticky.
Important Tip
Avoid adding too much flour.
A common mistake when making homemade bread is continuing to add flour until the dough becomes stiff. This can produce a dense loaf.
A soft dough usually produces a softer, lighter bread.
Kneading Method
Transfer the dough to a lightly floured surface.
Knead it for approximately 8–10 minutes by hand.
Push the dough forward with the heel of your hand, fold it back toward yourself, rotate it slightly, and repeat.
Continue until the dough becomes smoother, softer, and more elastic.
If it sticks slightly to your hands, resist adding large amounts of flour. A small amount of flour on your hands or work surface should be enough.
The dough should eventually feel soft and springy.
First Rise
Place the kneaded dough into a lightly greased bowl.
Turn the dough once so that its surface is lightly coated.
Cover the bowl with plastic wrap, a clean kitchen towel, or another suitable cover.
Place it somewhere warm and allow it to rise for approximately 1–1½ hours, or until it has roughly doubled in size.
The exact rising time will depend on the temperature of your kitchen.
The Perfect Rise
Don’t worry too much about the clock.
Instead, watch the dough.
When it has noticeably expanded and approximately doubled in volume, it is ready for the next stage.
Shaping the Bread
Once the dough has risen, gently press it down to release excess air.
Transfer it to a lightly floured surface.
Shape the dough into a loaf by gently flattening it into a rectangle, folding the sides toward the center, and then rolling it into a tight log.
Pinch the seam closed.
Place the shaped dough into a greased loaf pan with the seam facing down.
If you prefer, you can also divide the dough into smaller portions and shape individual dinner rolls.
Second Rise
Cover the shaped loaf again with a clean towel.
Allow it to rise for another 30–45 minutes, or until it becomes noticeably puffy.
This second rise helps create a lighter and softer finished loaf.
Don’t let the dough rise excessively, because an over-proofed loaf may collapse during baking.
Baking Method
Preheat your oven to 375°F (190°C).
Once the bread has completed its second rise, place the loaf in the preheated oven.
Bake for approximately 25–30 minutes, or until the top is beautifully golden brown and the loaf sounds hollow when gently tapped.
If the top begins browning too quickly, loosely cover it with aluminum foil during the latter part of baking.
The Butter Finish 🧈
As soon as the bread comes out of the oven, brush the top generously with melted butter.
This simple finishing step gives the crust a beautiful shine and adds an irresistible buttery flavor.
Let the bread cool in the pan for about 10 minutes, then carefully transfer it to a wire rack.
Although it can be difficult to wait, allowing the loaf to cool slightly helps the interior finish setting.
How to Serve Homemade Bread
There are almost endless ways to enjoy this bread.
Classic Buttered Bread
Slice the loaf while slightly warm and spread it with softened butter.
The butter melts into the fluffy crumb, creating the ultimate simple comfort food.
Breakfast Toast
Toast slices until golden and serve with:
- Butter
- Honey
- Jam
- Peanut butter
- Cream cheese
- Scrambled eggs
Sandwich Bread
Use thick slices to make delicious sandwiches with your favorite fillings.
Dinner Bread
Serve warm slices alongside:
- Soup
- Stew
- Pasta
- Roast chicken
- Grilled meat
- Salads
Sweet Treat
Spread warm bread with butter and honey for an incredibly simple dessert or afternoon snack.
Tips for Perfect Homemade Bread
Use fresh yeast:
Old or inactive yeast can prevent the dough from rising properly.
Don’t make the liquid too hot:
The milk and water should feel pleasantly warm, not scalding.
Add flour gradually:
Different kitchens and measuring methods can require slightly different amounts of flour.
Knead thoroughly:
Proper kneading develops the gluten that gives the bread structure and elasticity.
Give the dough enough time:
Bread cannot be rushed. A good rise contributes greatly to the final texture.
Don’t overload the dough with flour:
A slightly soft dough generally produces a more tender loaf.
Let the bread cool slightly:
Fresh bread continues to finish setting after it comes out of the oven.
Storage
Once completely cooled, store the bread in an airtight container or bread bag at room temperature.
For the best texture, enjoy it within a few days.
You can also slice the cooled loaf and freeze the slices in a freezer-safe bag. Then simply take out individual slices whenever you want homemade bread.
Why Everyone Loves This Bread ❤️
There is a reason homemade bread has such a special place in people’s hearts.
It’s inexpensive, comforting, versatile, and fills the entire kitchen with an aroma that no packaged loaf can truly reproduce.
The outside becomes beautifully golden while the inside stays soft and tender. Add a little butter while it is still warm, and you have something wonderfully simple yet incredibly satisfying.
Conclusion
This foolproof homemade bread is proof that you don’t need complicated ingredients or professional baking equipment to create something extraordinary.
With just warm milk, water, yeast, sugar, butter, salt, and flour, you can create a beautiful loaf that is soft, flavorful, golden, and perfect for sharing.
Whether you’re making it for your family, preparing sandwiches for the week, serving it alongside dinner, or simply craving a warm slice with butter, this recipe is one you’ll want to keep close.
Nothing beats the smell of freshly baked bread coming from your own kitchen. 🍞🧈❤️
❤️ For the Bread Lovers
If you love homemade bread, save this recipe and share it with someone who enjoys baking. And if you make it, a simple “Yummy!” is always appreciated! 😋🍞