

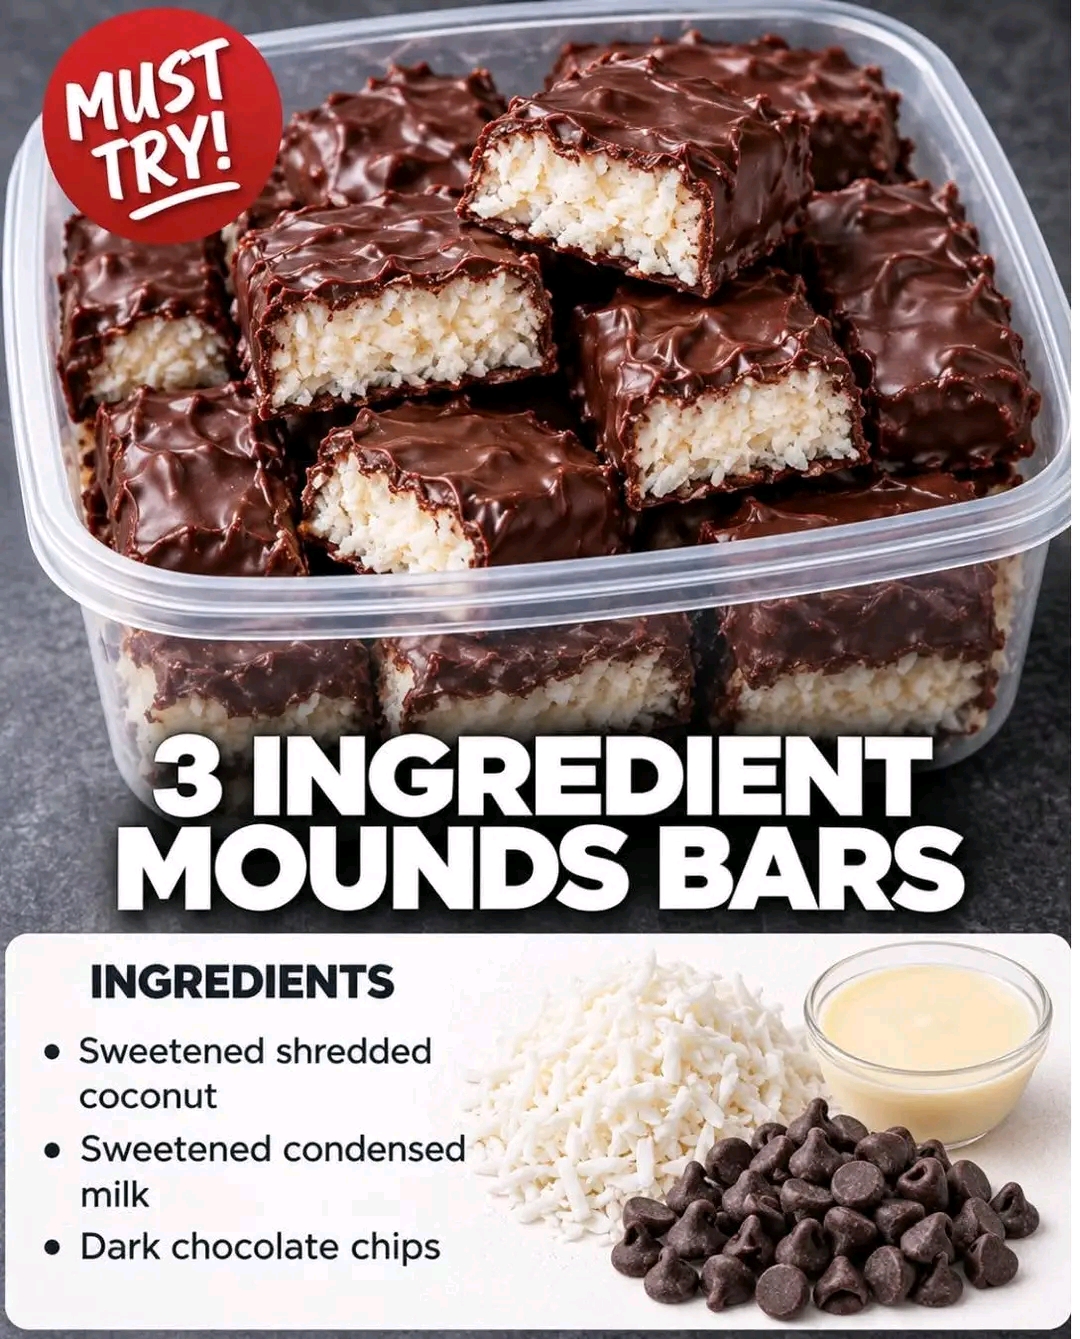
🍫🥥 3-Ingredient Mounds Bars
Chewy Coconut, Creamy Sweetness & Rich Chocolate in Every Bite
Introduction
If you love the classic combination of chocolate and coconut, these easy 3-Ingredient Mounds Bars are a treat you will want to make again and again.
With only shredded coconut, sweetened condensed milk, and chocolate chips, you can create a delicious homemade candy bar without complicated equipment, a long ingredient list, or difficult candy-making techniques.
The coconut becomes wonderfully chewy and tender after baking, while the sweetened condensed milk binds everything together and adds rich sweetness. Once the coconut centers are cooled and coated in melted chocolate, you get a beautiful contrast between the soft, chewy filling and the smooth chocolate shell.
These little bars are perfect for holidays, cookie trays, bake sales, parties, gifts, or simply keeping a batch in the refrigerator for those moments when you want something sweet.
🥥 Ingredients
For the Coconut Centers
- 2 cups shredded sweetened coconut
- 1 can sweetened condensed milk, 14 oz
- 1 teaspoon vanilla extract, optional
For the Chocolate Coating
- 2 cups semi-sweet or dark chocolate chips
- 1 teaspoon coconut oil, optional, for a smoother chocolate coating
Optional Decorations
- Extra shredded coconut
- A small pinch of flaky sea salt
- Melted white chocolate for drizzling
- Chopped almonds
- Finely chopped toasted coconut
🛒 Choosing Your Ingredients
Coconut
Sweetened shredded coconut gives these bars their classic chewy texture and extra sweetness.
If you prefer a less-sweet dessert, unsweetened coconut can be used, although the finished bars will taste less like traditional candy bars.
Sweetened Condensed Milk
Make sure you use sweetened condensed milk, not evaporated milk. They are very different products.
The condensed milk provides sweetness while also helping hold the coconut together.
Chocolate
Semi-sweet chocolate gives you a balanced flavor, while dark chocolate creates a richer, slightly less-sweet contrast against the coconut.
Milk chocolate can also be used if you prefer a sweeter candy.
👩🍳 Preparation
Before beginning, line an 8-inch square baking pan with parchment paper, leaving some parchment hanging over the sides.
This makes it much easier to remove the coconut mixture after it has cooled.
Preheat your oven to 350°F (175°C).
Method
Step 1: Make the Coconut Mixture
Place the shredded coconut in a large mixing bowl.
Pour the sweetened condensed milk over the coconut.
If using vanilla extract, add it now.
Stir everything together until the coconut is evenly coated and the mixture becomes thick and sticky.
You want the coconut mixture to hold together when pressed.
Step 2: Form the Coconut Layer
Transfer the mixture to your parchment-lined baking pan.
Using the back of a spoon or lightly dampened hands, press the coconut mixture firmly and evenly into the pan.
Try to create an even layer approximately ½ to ¾ inch thick.
Pressing firmly is important because it helps prevent the bars from falling apart when they’re cut.
Step 3: Bake
Place the pan in the preheated oven.
Bake for approximately 15–20 minutes, or until the coconut is lightly golden around the edges.
Don’t wait for the entire surface to become deeply brown. The goal is a tender, chewy coconut center with lightly toasted edges.
Remove the pan from the oven and allow the coconut layer to cool completely.
❄️ Step 4: Chill the Coconut
Once the coconut mixture has cooled to room temperature, place the pan in the refrigerator for approximately 30–60 minutes.
Chilling makes the coconut layer firmer and much easier to cut and handle.
🔪 Step 5: Cut the Bars
Lift the chilled coconut slab from the pan using the parchment paper.
Place it on a cutting board.
Cut it into small rectangular bars or squares.
You can make them large like traditional candy bars or smaller bite-sized pieces for a party tray.
🍫 Step 6: Melt the Chocolate
Place the chocolate chips in a microwave-safe bowl.
Heat in 20–30 second intervals, stirring thoroughly between each interval.
Continue until the chocolate is smooth and completely melted.
If desired, add a teaspoon of coconut oil to make the chocolate thinner and easier to coat with.
Be careful not to overheat the chocolate.
🍫 Step 7: Coat the Coconut Bars
Using two forks, carefully pick up each chilled coconut bar.
Dip it into the melted chocolate, turning gently until completely coated.
Allow excess chocolate to drip back into the bowl.
Place each coated bar onto a parchment-lined baking sheet.
Repeat until all the coconut pieces have been covered.
✨ Step 8: Decorate
While the chocolate is still wet, you can sprinkle the bars with:
- A little shredded coconut
- Toasted coconut
- Flaky sea salt
- Chopped almonds
For a beautiful finish, drizzle melted white chocolate over the tops after the chocolate coating has set.
❄️ Step 9: Let the Chocolate Set
Place the finished bars in the refrigerator for approximately 20–30 minutes, or until the chocolate is completely firm.
Once set, transfer them to an airtight container.
The Formation of the Bars
The magic of these simple treats comes from the transformation of three basic ingredients.
The shredded coconut provides texture and that unmistakable tropical flavor. The sweetened condensed milk surrounds the coconut and binds it into a soft, chewy mixture.
Baking gently firms the coconut center and adds a little toasted flavor.
Then comes the chocolate.
The melted chocolate forms a smooth outer shell that hardens when chilled. When you bite into one of the finished bars, the chocolate cracks slightly before giving way to the soft coconut center.
That contrast between firm chocolate and chewy coconut is what makes these bars so irresistible.
📖 A Little History
Chocolate and coconut have been paired together in confectionery for generations.
Coconut became a popular ingredient in American sweets as shredded and processed coconut became easier to purchase. At the same time, chocolate-coated coconut candies became popular because the rich chocolate balanced the sweet, tropical flavor of coconut.
The Mounds candy bar became particularly well known for its combination of coconut and dark chocolate, while similar coconut-and-chocolate treats have appeared in homemade candy recipes for decades.
Homemade versions became especially popular because they allow families to recreate that familiar flavor with simple pantry ingredients.
These 3-ingredient bars capture that same beloved combination in an especially easy homemade format.
⭐ Helpful Tips for Perfect Mounds Bars
Don’t Overbake
Overbaking can make the coconut dry and hard.
Remove the bars once the edges are lightly golden.
Press Firmly
Make sure the coconut mixture is packed firmly into the pan. This helps the bars stay together.
Chill Before Dipping
Cold coconut centers are much easier to handle and coat with chocolate.
Melt Chocolate Slowly
Chocolate can seize or become grainy if overheated, so use short microwave intervals and stir frequently.
Use Dark Chocolate for Balance
Because sweetened condensed milk is quite sweet, dark chocolate creates a delicious contrast.
Make Smaller Pieces
These treats are rich, so bite-sized pieces are perfect for parties and holiday dessert trays.
🎄 Perfect for Holidays
These homemade coconut bars make wonderful additions to a holiday candy platter.
Arrange them alongside:
- Chocolate fudge
- Peanut butter balls
- Homemade truffles
- Chocolate-covered pretzels
- Coconut macaroons
- Shortbread cookies
- Chocolate peppermint treats
For gifts, place several bars in small candy boxes or clear treat bags tied with ribbon.
☕ Serving Ideas
These bars are delicious straight from the refrigerator, but you can also allow them to sit at room temperature for a few minutes before serving.
Enjoy them with:
- Coffee ☕
- Hot chocolate
- Tea
- Cold milk
- Vanilla ice cream
For an extra-special dessert, chop one bar into pieces and sprinkle it over vanilla or chocolate ice cream.
❤️ Why Chocolate-Coconut Lovers Will Love Them
There are very few desserts that can be this easy and still feel so indulgent.
You don’t need a candy thermometer.
You don’t need complicated decorating skills.
You don’t need a long shopping list.
Just coconut, sweetened condensed milk, and chocolate come together to create something wonderfully rich and satisfying.
The coconut is soft and chewy.
The chocolate is smooth and decadent.
And every bite has that nostalgic chocolate-coconut combination that so many candy lovers adore.
🧊 Storage
Store the finished bars in an airtight container.
Keep them refrigerated for a firmer chocolate coating and longer freshness.
Place parchment paper between layers if you’re stacking them so they don’t stick together.
They can also be frozen in a tightly sealed container. Allow them to thaw in the refrigerator before serving.
🎁 Homemade Gift Idea
For a beautiful homemade gift, make a batch of these bars and arrange them in a small box lined with parchment paper.
Add a few pieces of toasted coconut on top and finish the box with a simple ribbon.
Homemade treats like these are especially wonderful because they feel personal without requiring hours in the kitchen.
Conclusion
These 3-Ingredient Mounds Bars prove that you don’t need complicated ingredients to create an unforgettable dessert.
A simple mixture of shredded coconut and sweetened condensed milk becomes a tender, chewy center. A coating of rich chocolate transforms it into a beautiful homemade candy that looks special and tastes even better.
Whether you’re preparing them for a holiday gathering, making a sweet treat for your family, or simply satisfying a chocolate-and-coconut craving, this recipe is one worth keeping.
Sometimes the simplest recipes become the ones we make over and over again—and these little chocolate coconut bars are exactly that kind of recipe. 🍫🥥❤️
❤️ For the Chocolate-Coconut Lovers
If you’re a true chocolate-and-coconut lover, this recipe deserves a place in your recipe collection.
Make a batch, share a few with the people you love, and keep the rest chilled for whenever that sweet craving appears.
If you love easy homemade dessert recipes, say “YES” in the comments so you can keep receiving more delicious recipes! 😍❤️