

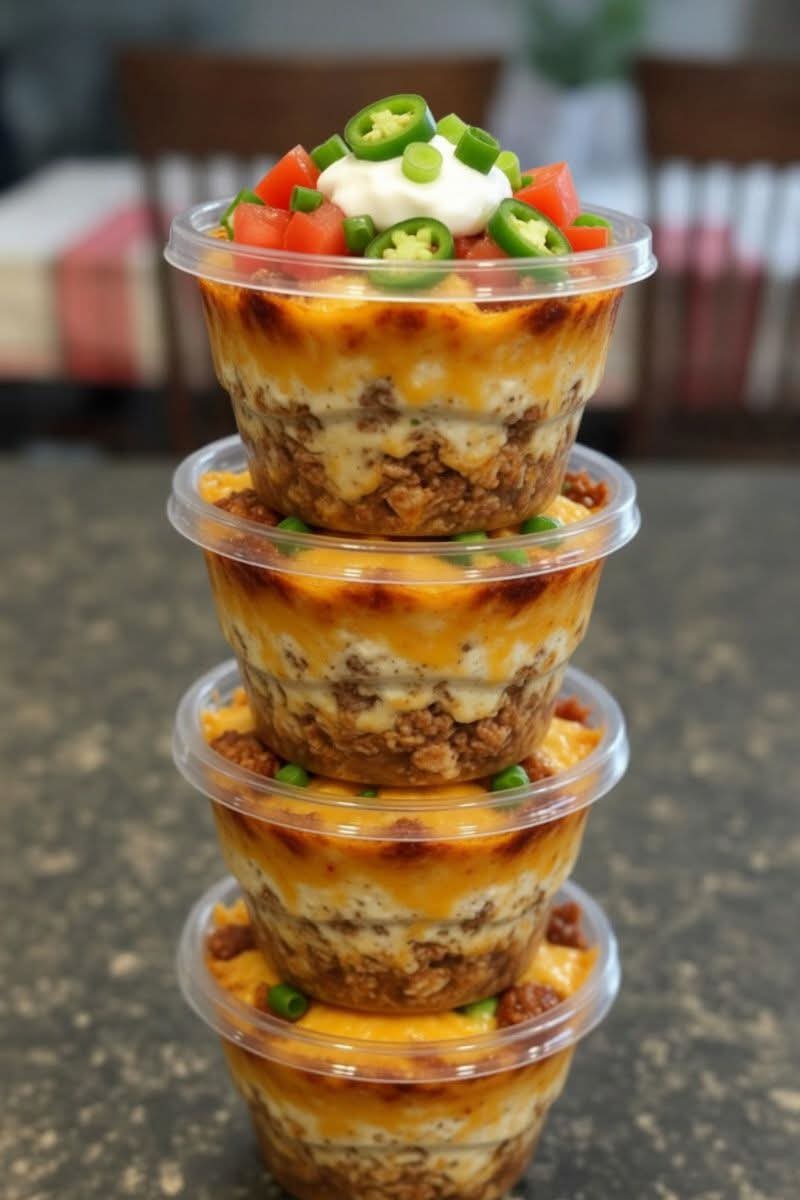
🌮 Layered Taco in a Cup (Walking Taco Casserole Cups)
🧀 Introduction
If you love tacos but want something fun, portable, and perfect for meal prep, Walking Taco Casserole—also known as a Layered Taco in a Cup—is exactly what you need. This dish combines all the bold flavors of traditional tacos—seasoned beef, creamy layers, melted cheese, and fresh toppings—stacked beautifully in individual cups.
It’s ideal for parties, quick dinners, or even selling as a street-style snack. Plus, it’s customizable and incredibly satisfying.
🥗 Nutritional Information (approx. per serving)
- Calories: 350–450 kcal
- Protein: 20–25 g
- Carbohydrates: 15–25 g
- Fat: 20–28 g
- Fiber: 2–4 g
- Sodium: Moderate to high (depends on seasoning)
🛒 Ingredients (Serves 6–8 cups)
For the meat layer:
- 500 g ground beef (or chicken)
- 1 small onion, finely chopped
- 2 cloves garlic, minced
- 2 tbsp taco seasoning
- ½ cup tomato sauce
For the creamy layer:
- 1 cup cream cheese (softened)
- ½ cup sour cream
- ½ cup shredded cheddar cheese
For the base (optional but recommended):
- Crushed tortilla chips or cooked rice
For topping:
- 1 cup shredded cheddar or mozzarella
- Diced tomatoes
- Sliced jalapeños
- Chopped green onions
- Optional: lettuce, olives, avocado
🍳 Instructions
Step 1: Cook the meat
- Heat a pan over medium heat.
- Add ground beef and cook until browned.
- Add onion and garlic, cook until soft.
- Stir in taco seasoning and tomato sauce.
- Simmer for 5–7 minutes until thick.
Step 2: Prepare creamy mixture
- In a bowl, mix cream cheese, sour cream, and shredded cheese until smooth.
Step 3: Assemble layers
In small oven-safe cups or containers:
- Add a base layer (chips or rice).
- Add a layer of meat.
- Add creamy mixture.
- Repeat layers if desired.
- Finish with shredded cheese on top.
Step 4: Bake
- Bake at 180°C (350°F) for 10–15 minutes until cheese melts and bubbles.
Step 5: Garnish & serve
- Top with tomatoes, jalapeños, and green onions.
- Serve warm.
🔥 Methods & Cooking Tips
- Meal prep method: Store in airtight cups for up to 3 days in the fridge.
- Low-carb version: Skip chips and use cauliflower rice.
- Extra creamy: Add a little heavy cream to the cheese mix.
- Spicy lovers: Add chili flakes or hot sauce to the meat.
📜 History
This dish is inspired by the famous Walking Taco, a popular American street food often served in chip bags. It evolved into casseroles and layered meals as people started experimenting with convenient, portable comfort food.
The “cup version” is a modern twist—perfect for social media, meal prep culture, and grab-and-go eating.
🏗️ Formation (Layer Structure)
A perfect taco cup follows this structure:
- Crunchy base (chips/rice)
- Savory protein (seasoned meat)
- Creamy layer (cheese mix)
- Melted cheese topping
- Fresh garnish
This balance gives texture, flavor, and visual appeal.
❤️ Why People Love It
- Easy to make and customize
- Perfect portion control
- Great for parties or selling food
- Combines creamy, crunchy, and spicy textures
- Visually appealing (Instagram-worthy 🔥)
🧑🍳 Lovers’ Tips (Pro Hacks)
- Use smoked paprika for deeper flavor
- Add corn or beans for extra texture
- Torch the cheese top slightly for a grilled look
- Layer neatly for a clean presentation like your picture
✅ Conclusion
Layered Taco in a Cup is more than just a recipe—it’s a fun, modern way to enjoy tacos. Whether you’re cooking for yourself, your family, or even starting a small food business, this dish is simple, versatile, and guaranteed to impress.