

It is preferable to begin with the original French ombre if you are a novice. A French manicure differs from a French ombre in that there is no sharp contrast between the white nail tip and the nail base; instead, the white nail tips gradually blend into the flesh or a nude base. Although this method might seem daunting, you can accomplish it with ease using this detailed tutorial (with pictures). Swipe up!
What You Need
- Base coat (clear nail polish)
- White nail polish
- Nude or flesh-toned nail polish
- Liquid latex tape
- Nail polish remover
- A small brush or a Q-tip
- Disposable makeup sponge
- Top coat
Step 1: Apply The Base Coat
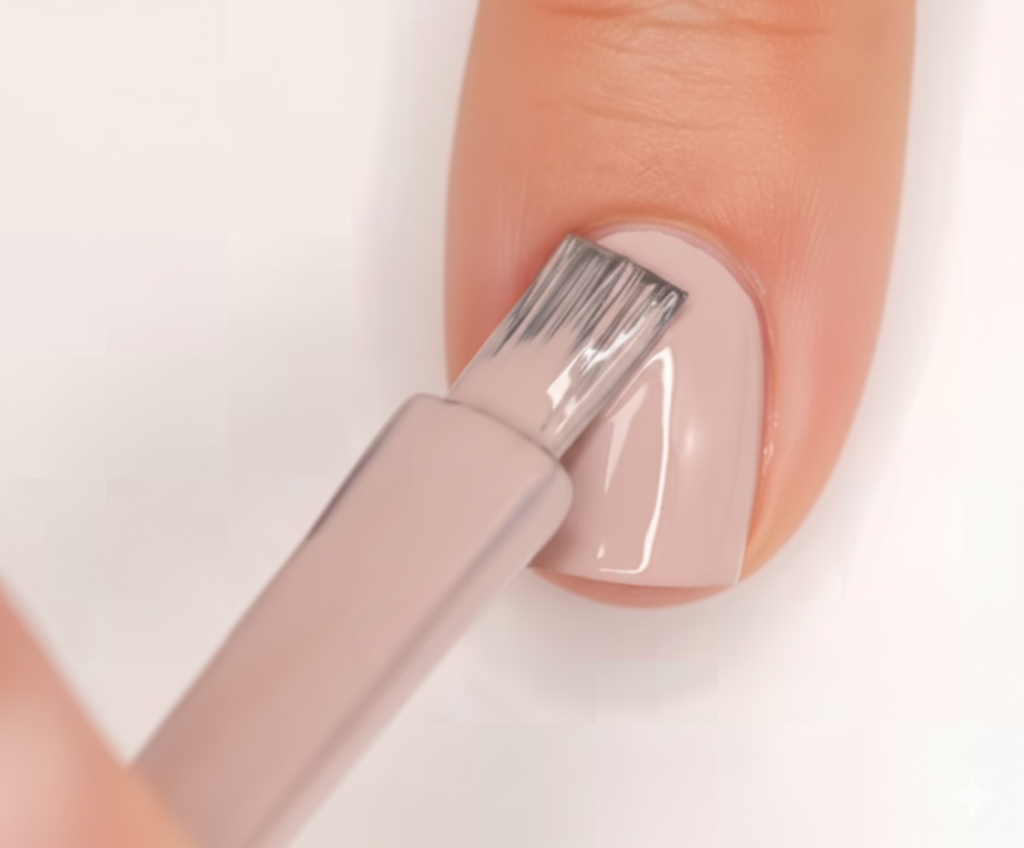
Step 2: Apply The Nude Or Flesh-Toned Nail Polish
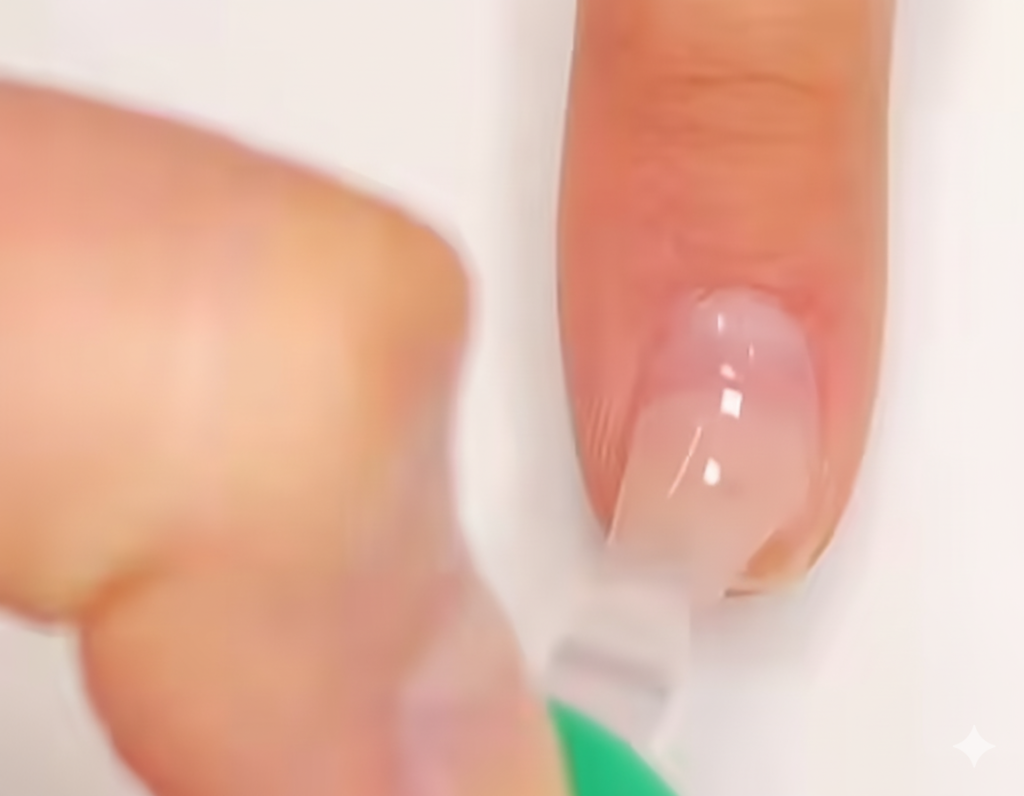
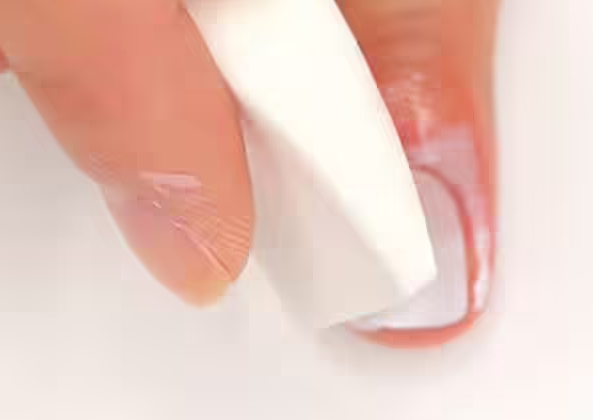
Step 3: Apply The Liquid Latex Tape To The Cuticles
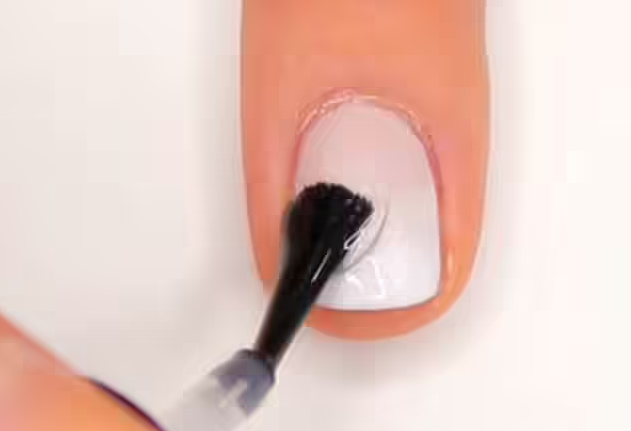
Step 4: Apply The White Nail Polish To The Sponge
Step 5: Apply The Nude Or Flesh-Toned Nail Polish To The Sponge
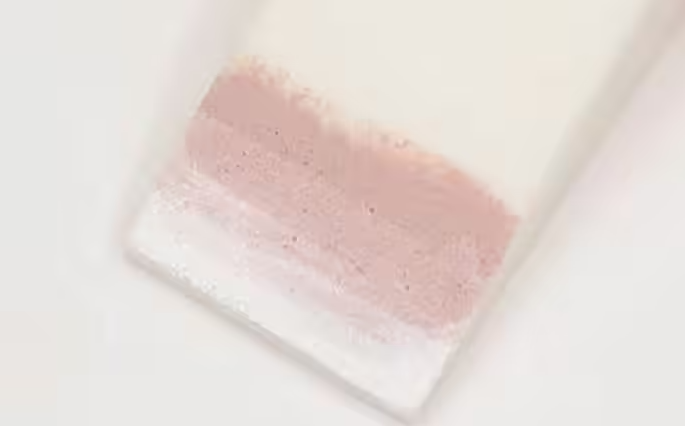
Step 6: Dab The Sponge Onto The Nail
Step 7: Repeat Steps 5 And 6
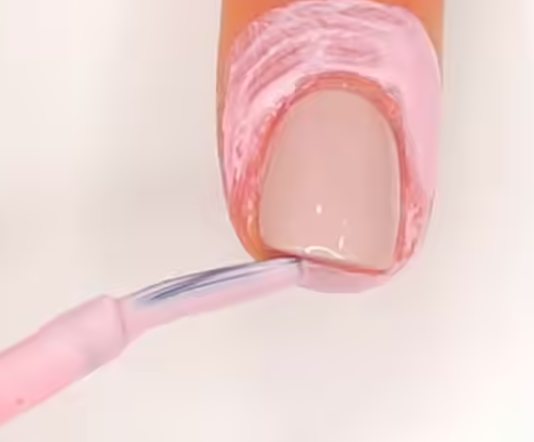
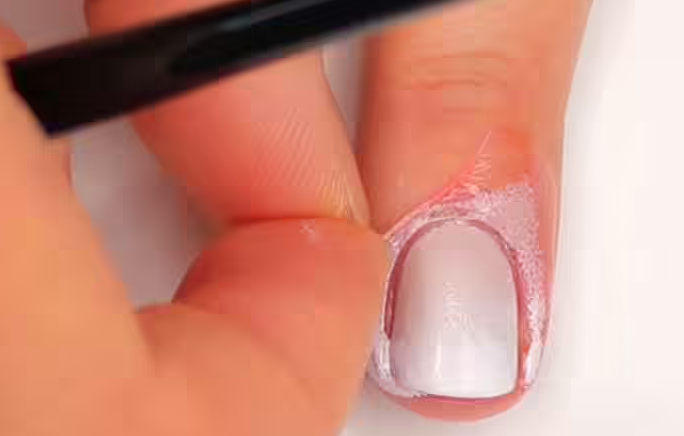
Step 8: Remove The Liquid Latex Tape
Step 9: Apply The Top Coat
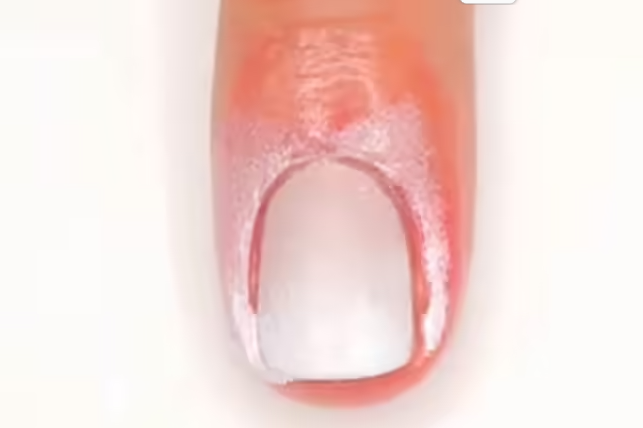
Final Result
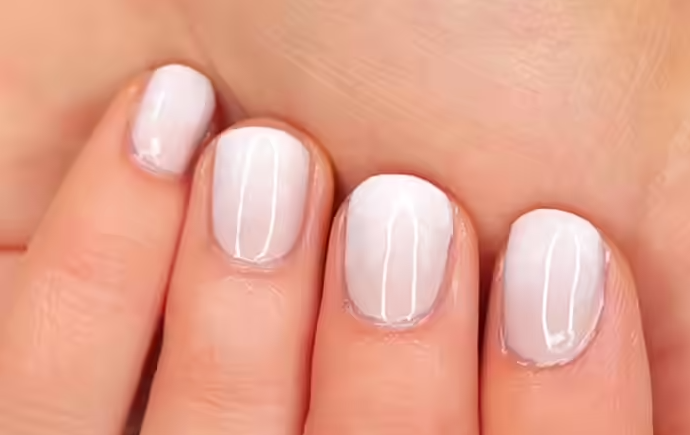
You’ve made the switch to gorgeous French ombre nails. You may make glitzy glitter ombre manicures or an ombre appearance by combining different colors. Continue reading for expert advice on how to draw attention to your ombre nails!
Extra Advice Try covering the ombre with a sheer polish. An attractive, glossy finish and more color blending can be achieved with a sheer or shimmer top coat. To extend the life of your manicure and smooth out the design, apply a premium top coat. Use acetone and a tiny brush to blend colors. If the gradient appears harsh, smooth the transition by softly dabbing a small brush with acetone. To prevent removing too much polish, use a delicate touch.
To improve control, work in thin layers. Applying several thin coats rather than a single thick coat lessens the possibility of smudging or streaking and helps create a more realistic fade. You may learn how to make glitter ombre and rainbow ombre manicures by watching these tutorials. Check them out by scrolling down.